 BambooForge Labs
Shopware Connector | Shopware 6 Odoo Integration
Two-way Shopware 6 integration over the Admin API: products, customers, orders, refunds and stock, with HMAC-signed webhooks and a sync queue.
Available for Odoo 16.0, Odoo 17.0, Odoo 18.0, Odoo 19.0, Odoo 20.0. Technical name bambooforge_shopware_connector.
Transcript of the walkthrough (Odoo 20)
Shopware Connector / Shopware 6 Odoo Integration. Two-way Shopware 6 integration over the Admin API: products, customers, orders, refunds and stock, with HMAC-signed webhooks and a sync queue. The connector keeps Odoo and Shopware in sync over the official Shopware 6 Admin API. It covers: In the next few minutes: matching the storefront total, then tested against the real thing, then step 1 — create an admin api integration in shopware, then step 2 — create the connection in odoo, then step 3 — first sync (dry-run, then live).
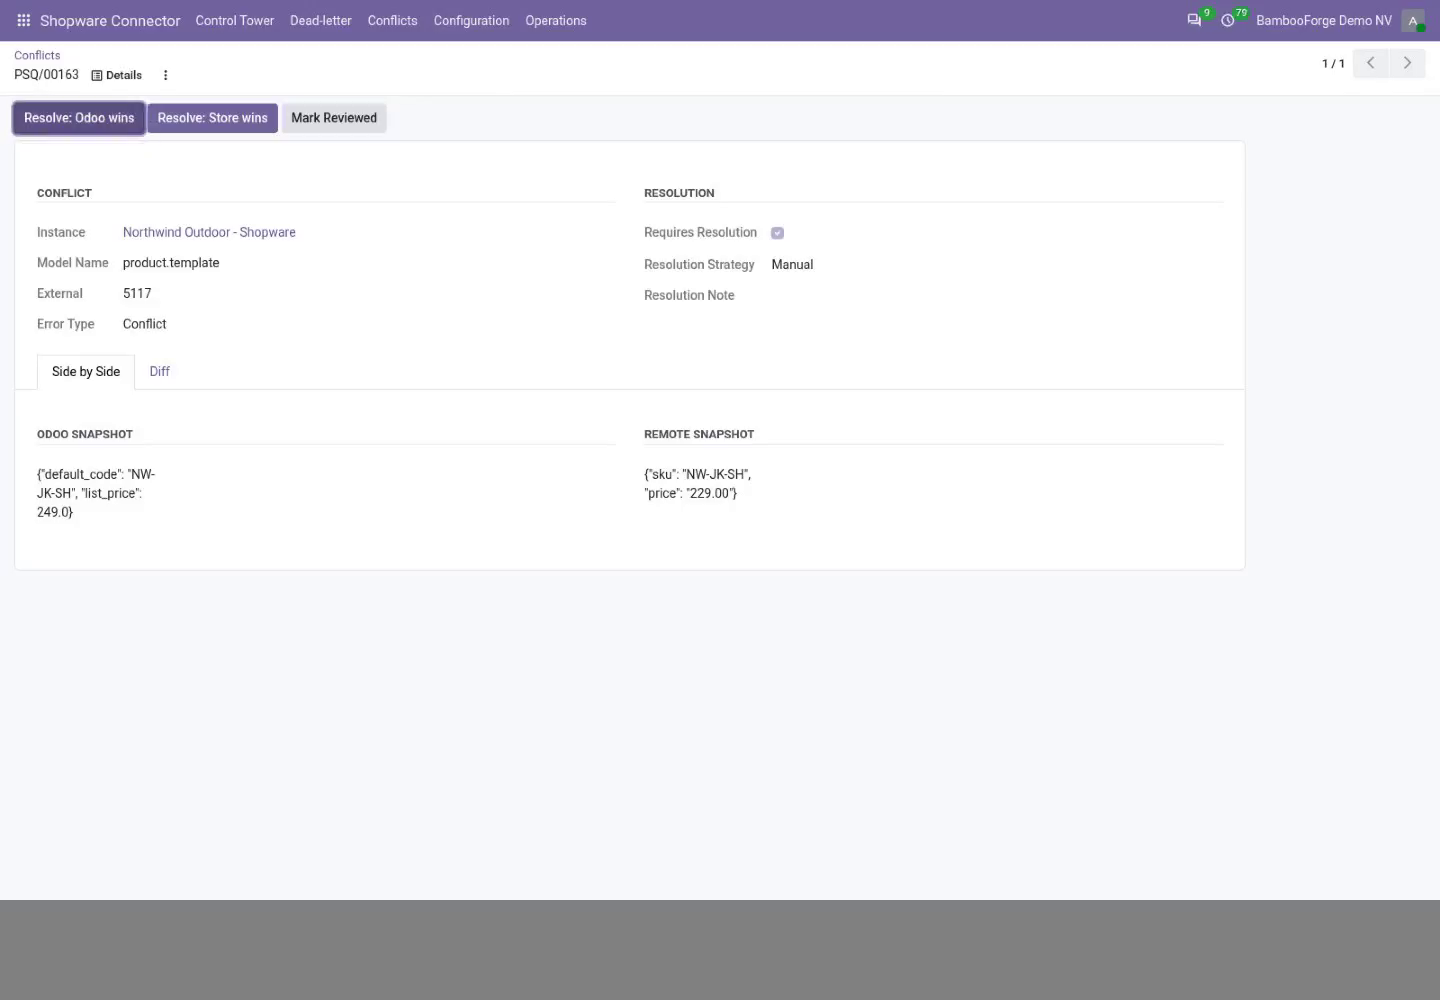
Then what this app deliberately does not do, so you can tell before you buy whether it fits. Everything lives under Shopware Connector then Control Tower then Dead-letter then Conflicts. Matching the storefront total. A storefront charges shipping and grants discounts outside the product lines, so an order rebuilt from those lines alone is worth less than the order the customer paid for: the sale looks smaller than it was and never reconciles against the platform payout.
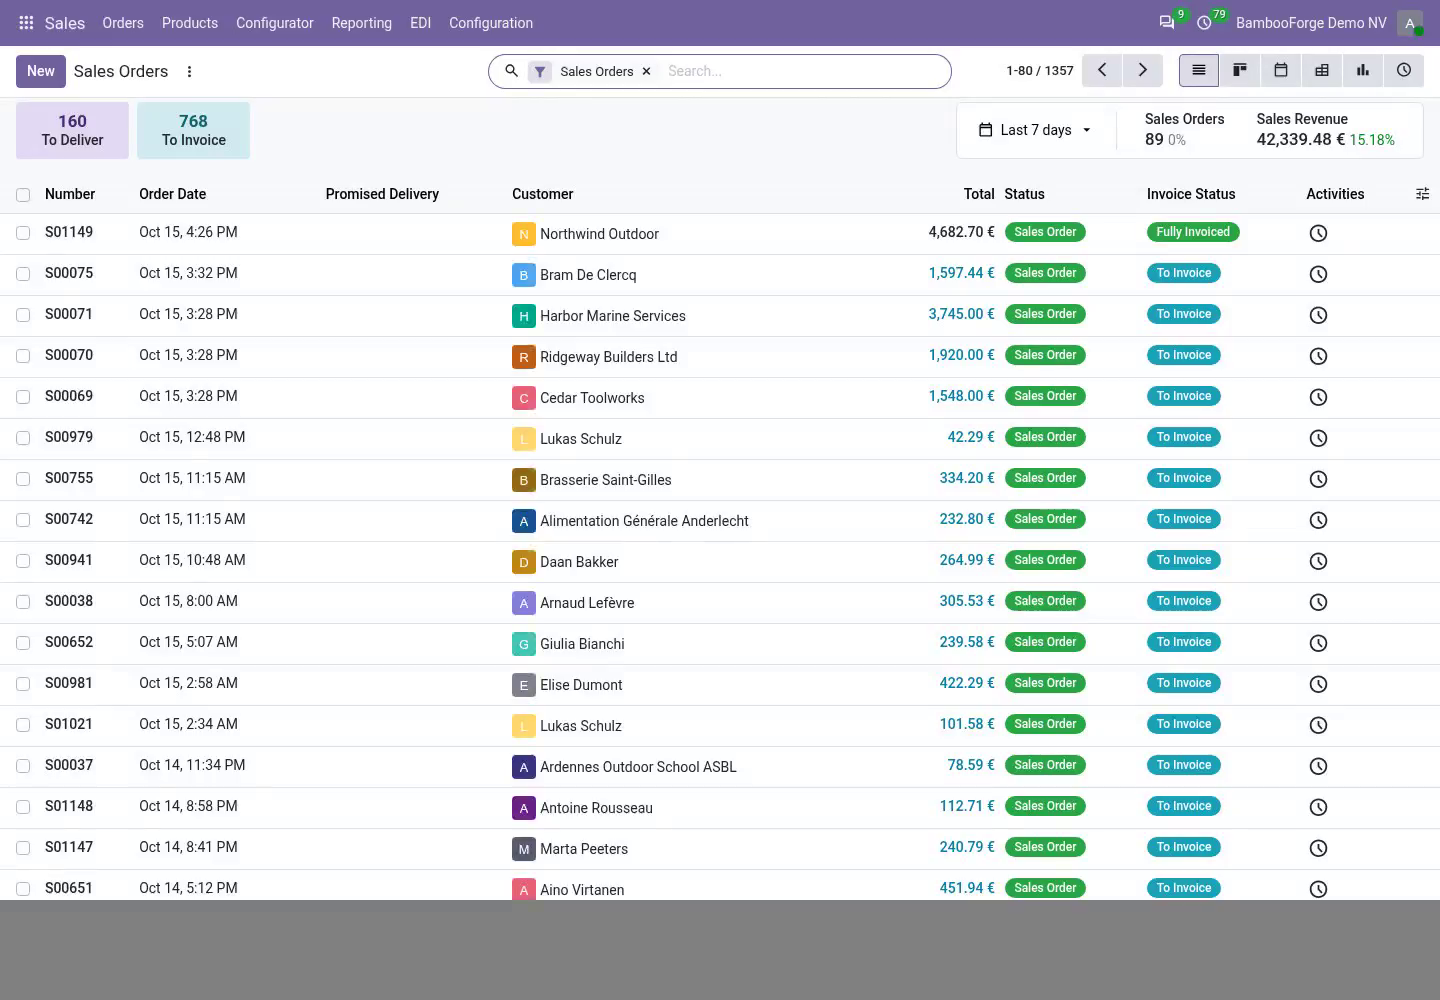
the shipping charge is imported as its own order line, on a clearly named service product; whatever still separates Odoo from the platform total — platform discounts, fees, rounding — is posted as a single adjustment line rather than dropped; the platform total and the remaining difference are stored on the order and shown on its connector tab; an order that still does not match within Total Tolerance raises a validation warning, so the gap is visible instead of silent. With Match Storefront Totals on the instance (on by default): Tested against the real thing. Automated tests run against a bundled mock store on every release; the line below is the part no mock can give you - the connector pointed at the real platform, with real records and real order totals. Tested for real against Shopware 6.7: 16 products, 4 customers and 3 orders placed through the Store API arrived in Odoo at 91.96 each, 23 sync jobs, 0 errors.
Step 1 — Create an Admin API integration in Shopware. The connector authenticates as a Shopware Integration (OAuth2 client-credentials). In your Shopware 6 administration: 1. Go to Settings ▸ System ▸ Integrations.
2. Click Add integration. 3. Give it a Name such as Odoo, and grant it the access it needs (administrator access, or read/write on Products, Customers and Orders).
4. Save. Shopware shows the Access key ID and the Secret access key once. 5.
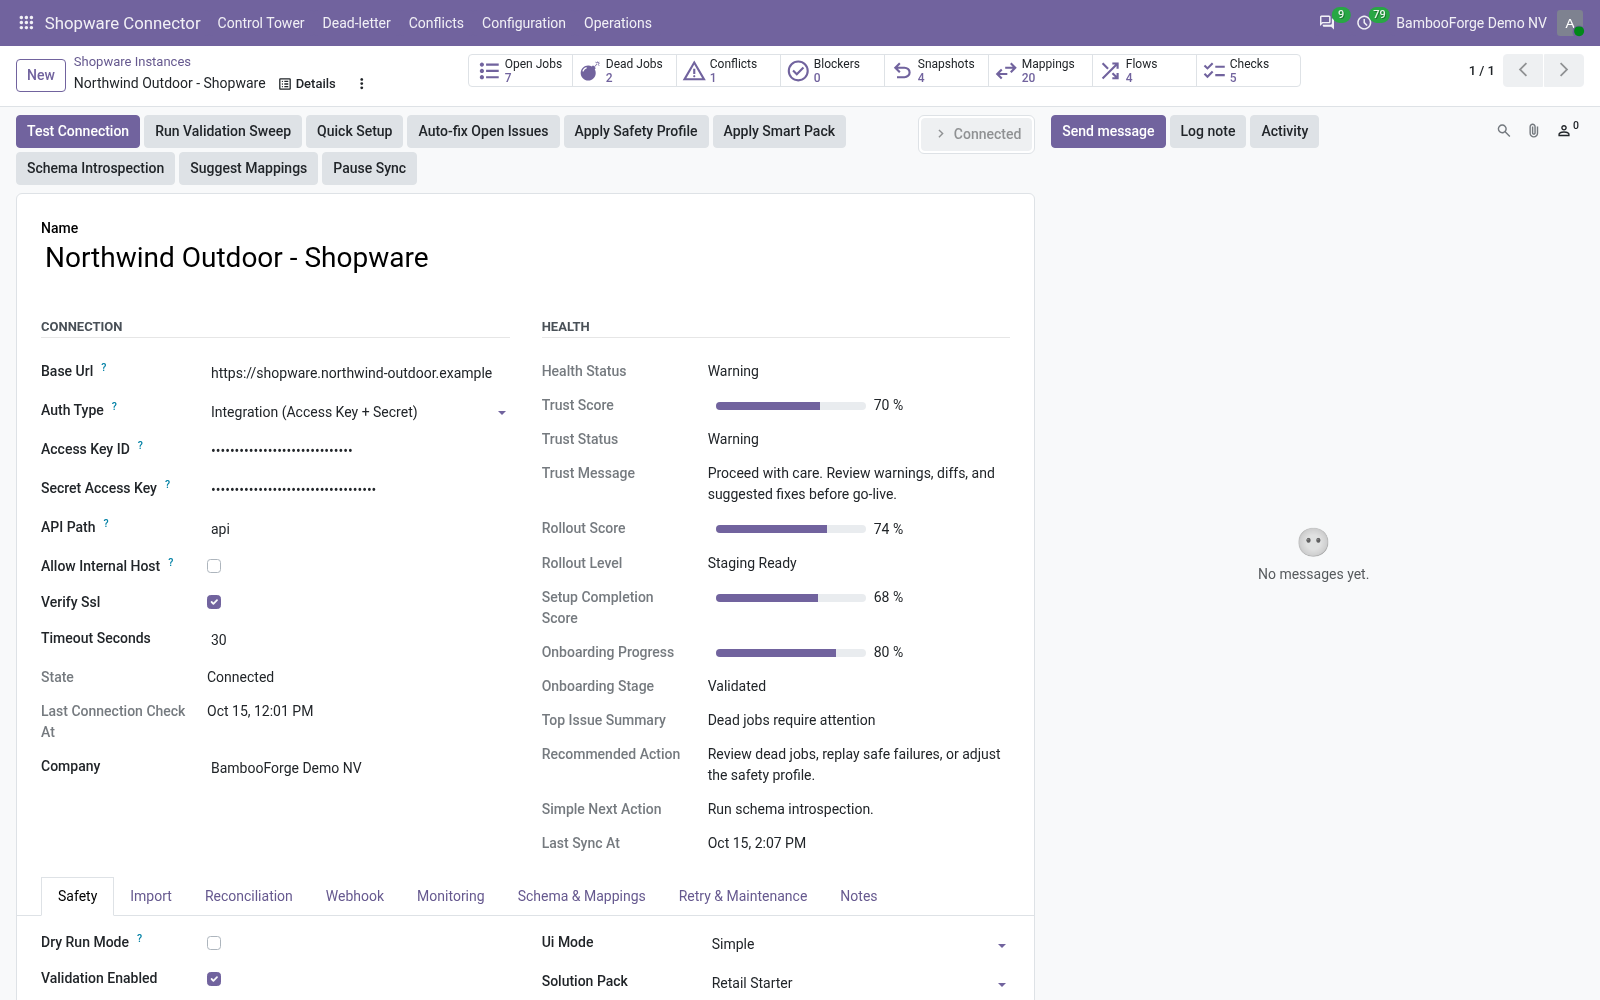
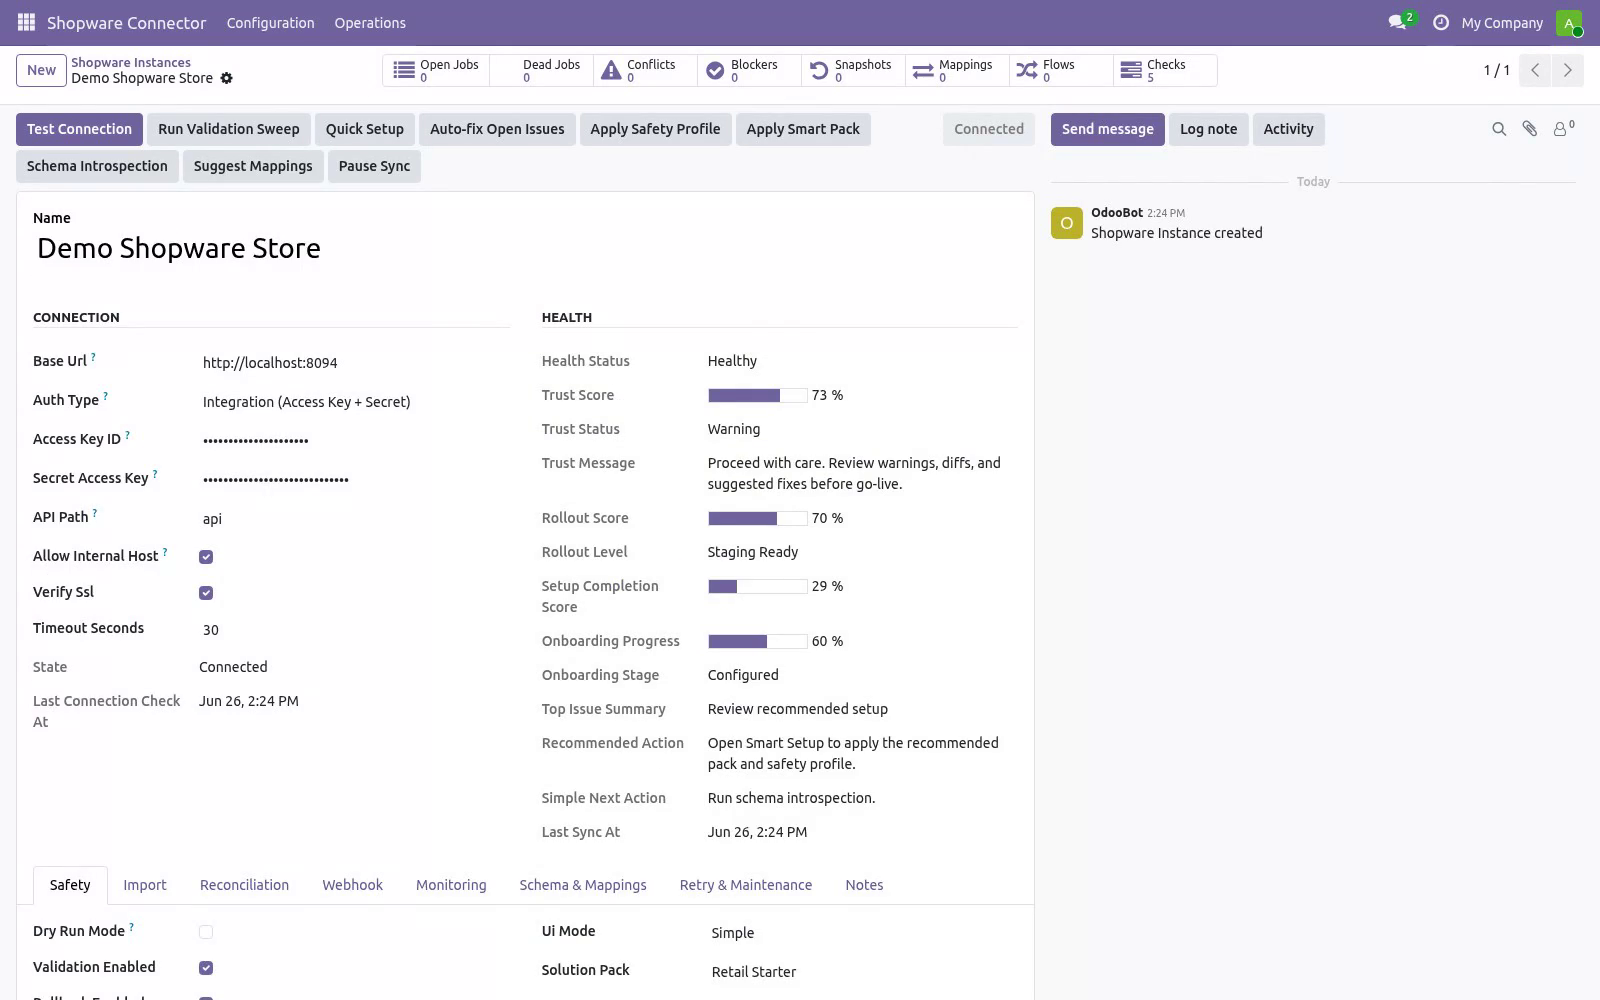
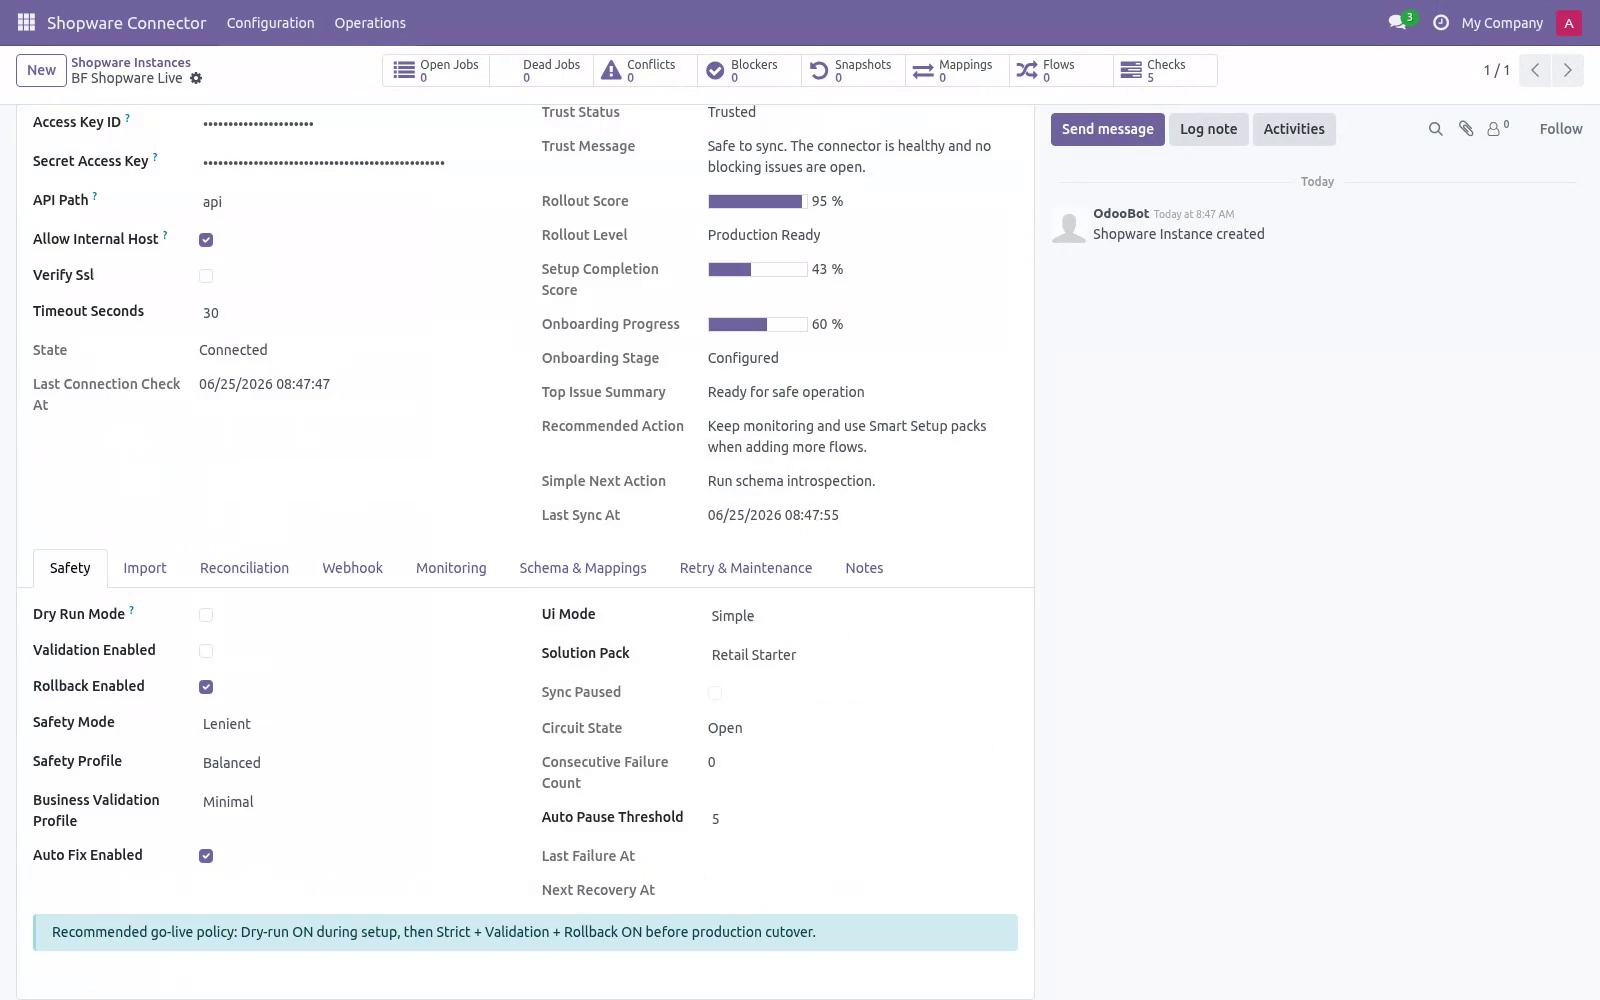
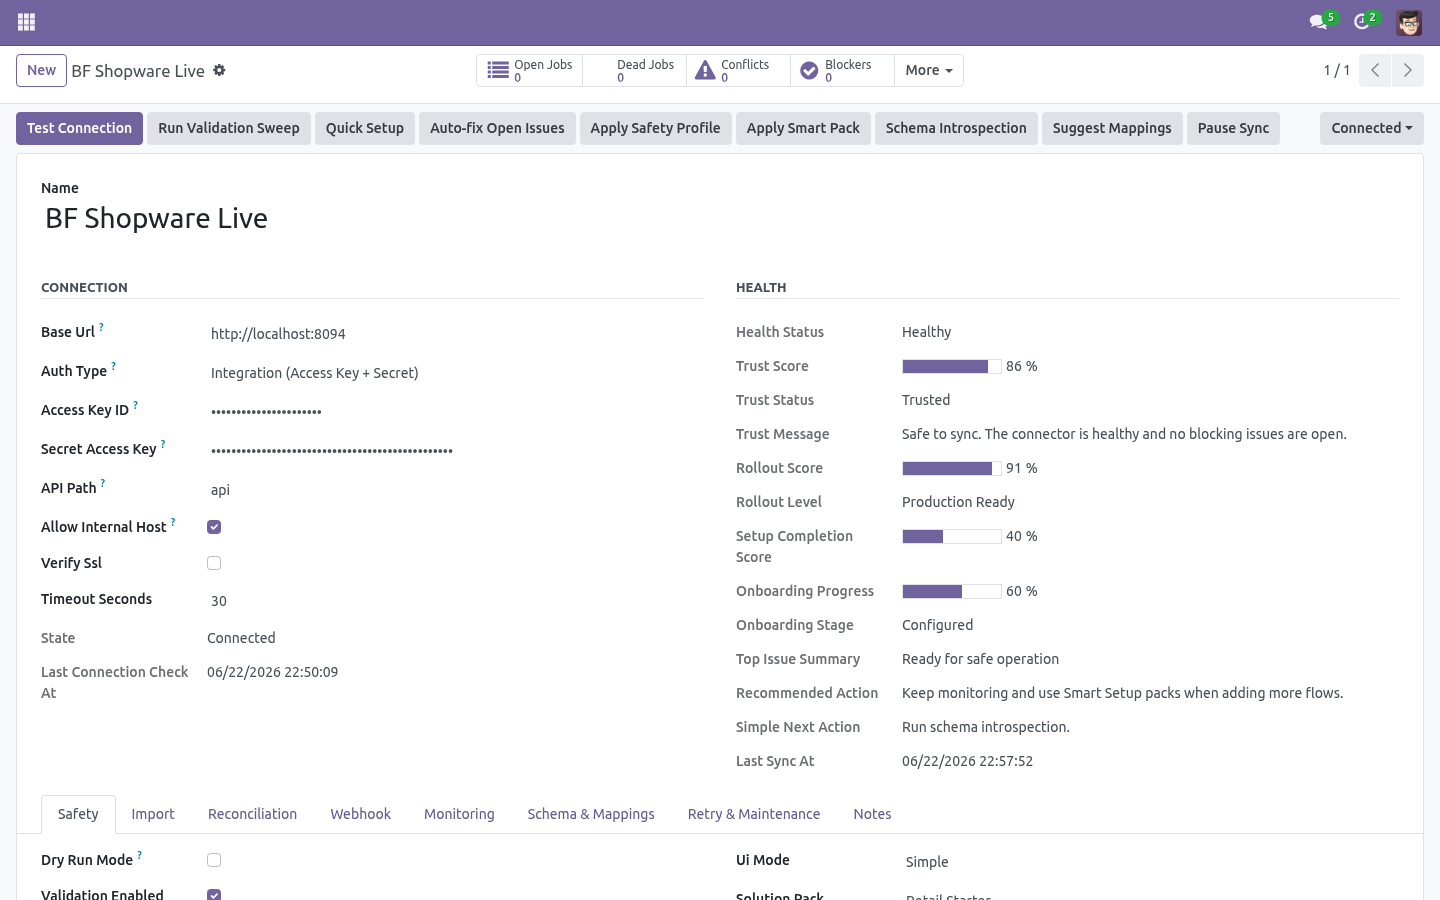
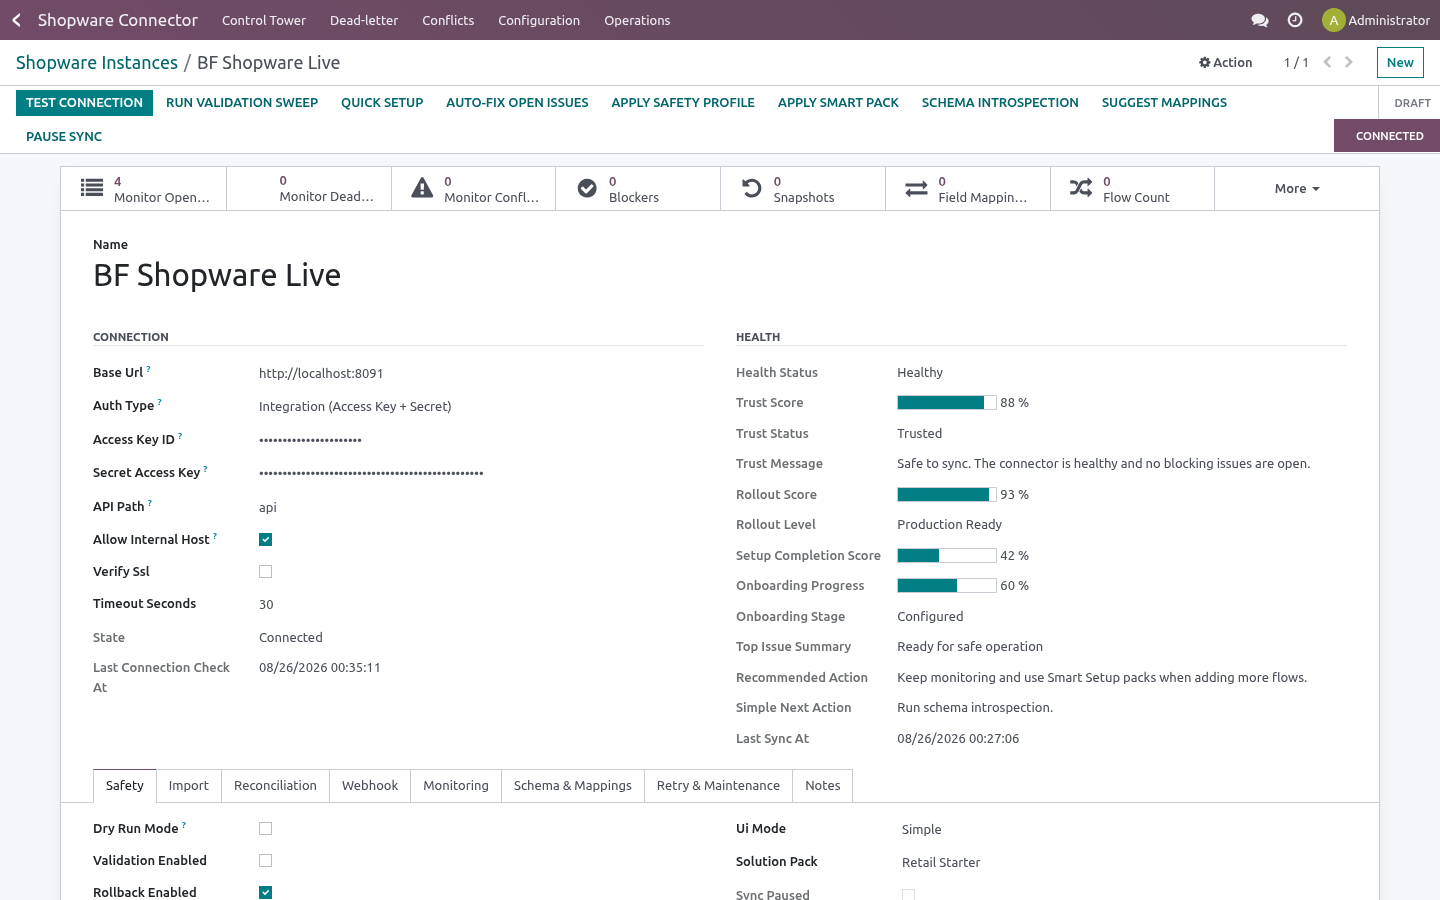
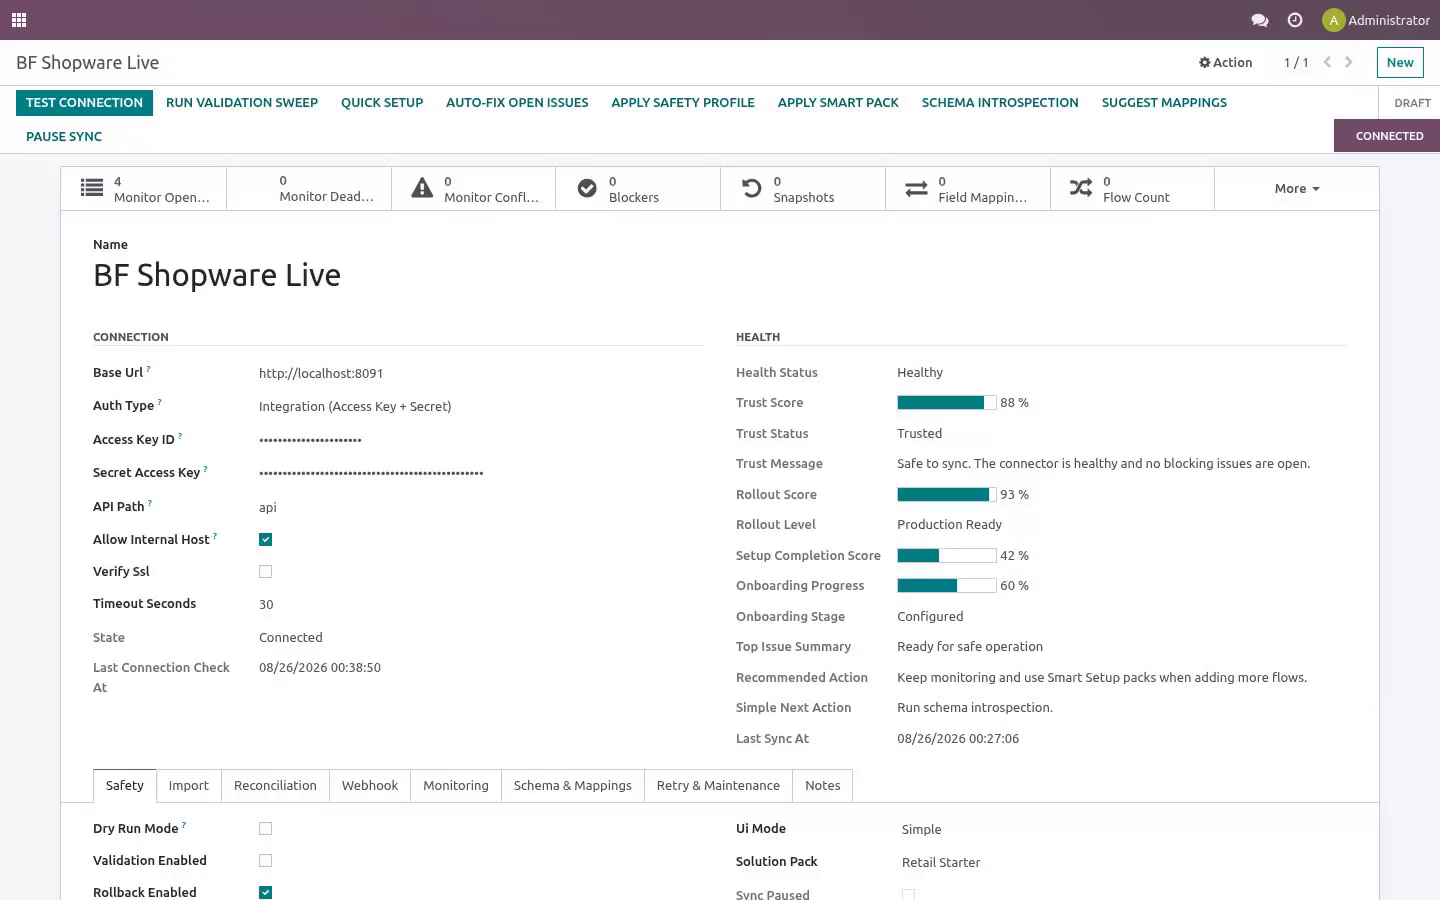
Copy both values now — the secret is shown only at creation time. Step 2 — Create the connection in Odoo. Open Shopware Connector ▸ Configuration ▸ Instances and create a record. Then click Test Connection.
A green Connected state means the credentials and URL are correct, and the default order-state mapping is seeded automatically on first successful connect. If it fails, the exact error is shown on the form and recorded in Logs (see Troubleshooting). Step 3 — First sync (dry-run, then live). New instances start with Dry-run ON.
In dry-run, import and delete jobs simulate writes: instead of changing data they produce Validation Results you can review under Shopware Connector ▸ Operations ▸ Validation Results. This lets you confirm what would happen before anything is written. 1. On the instance, click Import Products (and/or Import Customers, Import Orders).
This enqueues jobs; it does not block the UI. 2. Jobs are processed by the Shopware Queue Processor scheduled action (every minute), or immediately if you run it manually from Operations ▸ Queue Jobs. 3.
Review Validation Results while still in dry-run. 4. When satisfied, open the instance, turn Dry-run OFF, and run the imports again to write the records for real. Order status mapping.
Shopware drives each order through a state machine; an order carries a stateMachineState whose technicalName (e.g. open, in_progress, completed, cancelled) identifies its current state. Under Configuration ▸ Order State Mappings each instance gets a default table that decides what happens to the Odoo sale order when an order reaches a given state: Change any row to Ignore (do nothing), Keep draft, Confirm sale order or Cancel sale order. Unknown/custom states default to Ignore, so a state you have not mapped never triggers a destructive transition.
Add a row for any custom state your store introduces (use the exact technicalName). Field mapping & customization Field Mappings (Configuration) map Shopware fields to Odoo fields per model. Use Generate suggested mappings on the instance to seed the business-critical ones, then adjust. The mapping board flags fields that need attention.
Schema Fields lists the discovered Shopware fields per resource. Run Schema Introspection on the instance to refresh it from your live store. Stock / images / tax are opt-in toggles on the instance: Sync stock, Sync images (and max images), Upload images on export, Sync taxes (and auto-match taxes on import). They are off by default; turn on only what you need.
Tax auto-match never auto-creates taxes — it only links to an existing Odoo sale tax by name. Refunds: Sync refunds discovers Shopware order_slip credit notes during order import and creates draft Odoo credit notes; Auto-post refund (off by default) posts them automatically so accountants can review first. Automation (scheduled actions & webhooks). The module ships these scheduled actions (Settings ▸ Technical ▸ Scheduled Actions): Delivery URL: https://<your-odoo-domain>/shopware/webhook Signature: each delivery must carry an X-Shopware-Signature header — the HMAC-SHA256 of the raw request body keyed with the instance Webhook Secret (admin-only field on the instance).
The signed body must include an emitted_at timestamp for replay protection. Turn on Auto import / Auto reconcile per model on the instance to let the scheduled actions keep things in sync hands-free. Safety features Dry-run mode — simulate writes and review Validation Results before going live. Business validation profiles — Minimal / Standard / Strict gate risky writes.
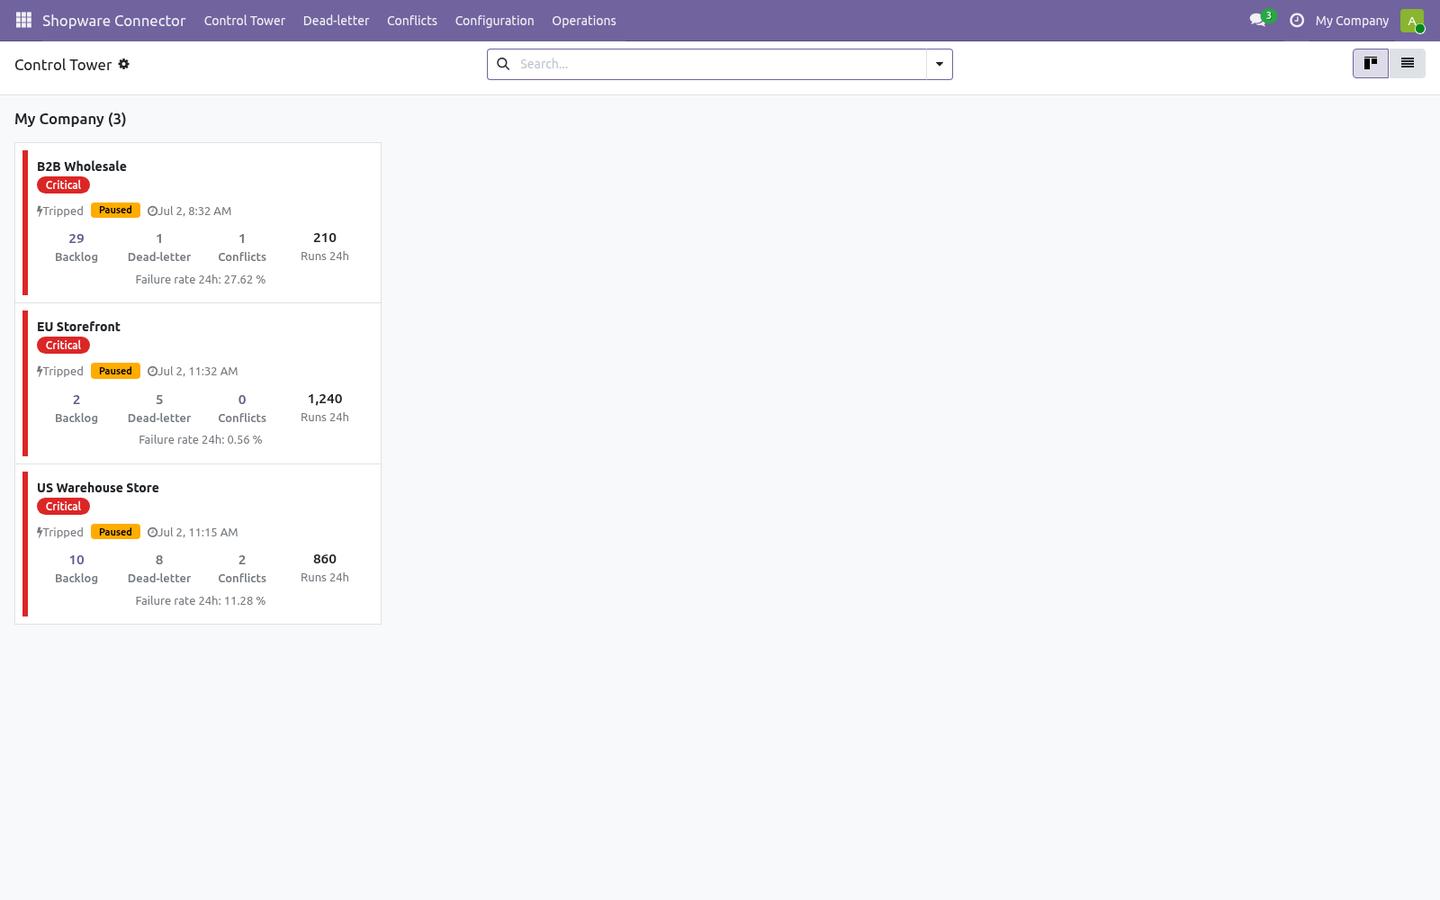
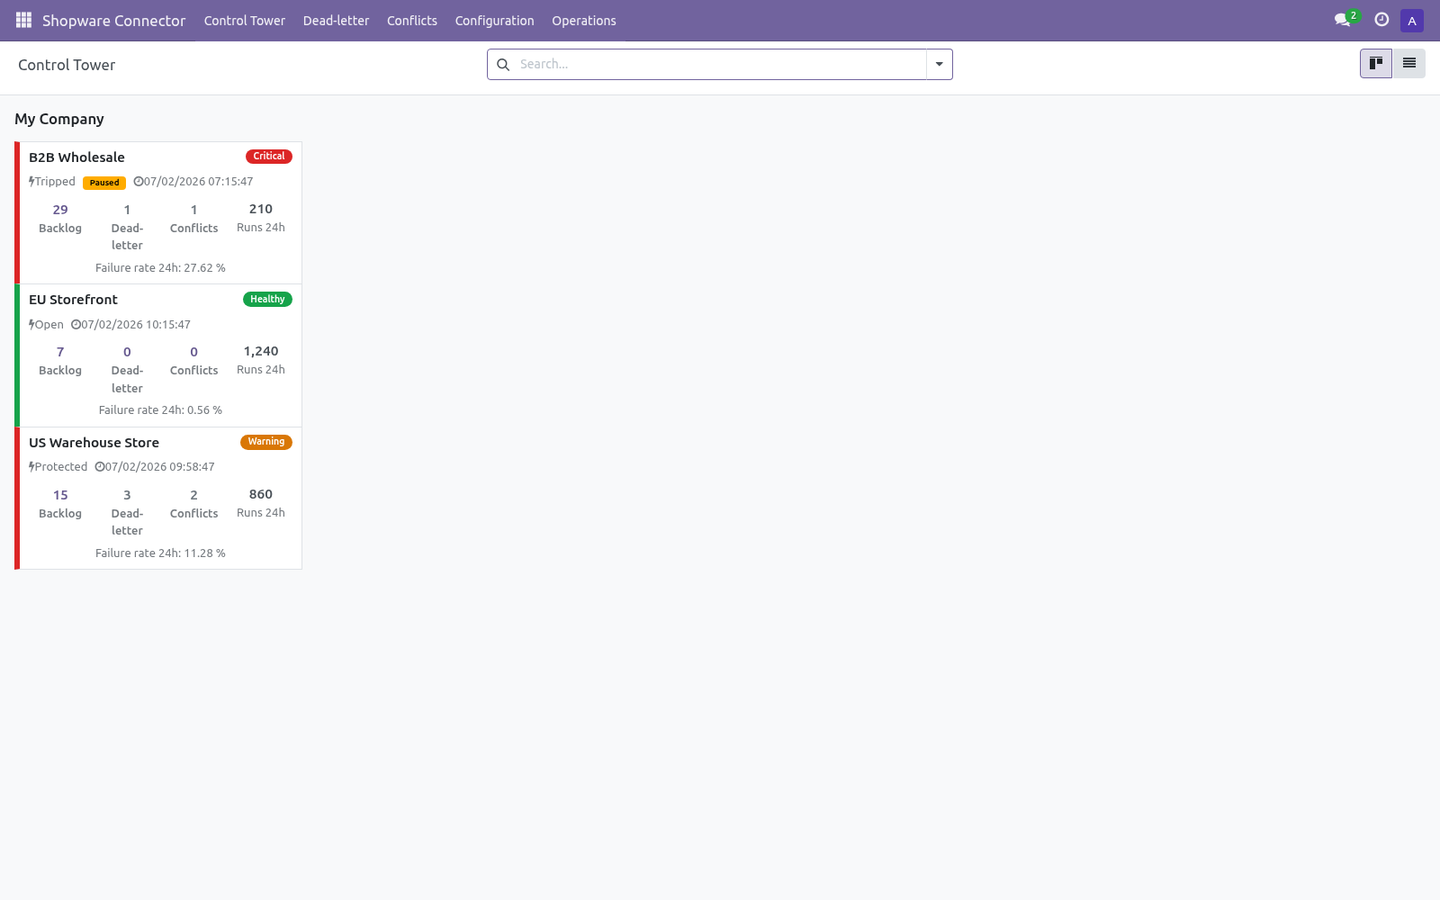
Resilient queue — every remote action is a job with retry and configurable fixed/exponential back-off, plus a dead-letter state for jobs that keep failing. Circuit breaker — after repeated failures an instance auto-pauses (Tripped); the Auto Recover action reopens it once the store responds again, or click Resume. Rollback snapshots — when enabled, imports capture a snapshot so you can undo a batch from Operations ▸ Rollback Snapshots. SSRF guard — the connector refuses internal/loopback/private hosts unless Allow internal host is explicitly enabled.
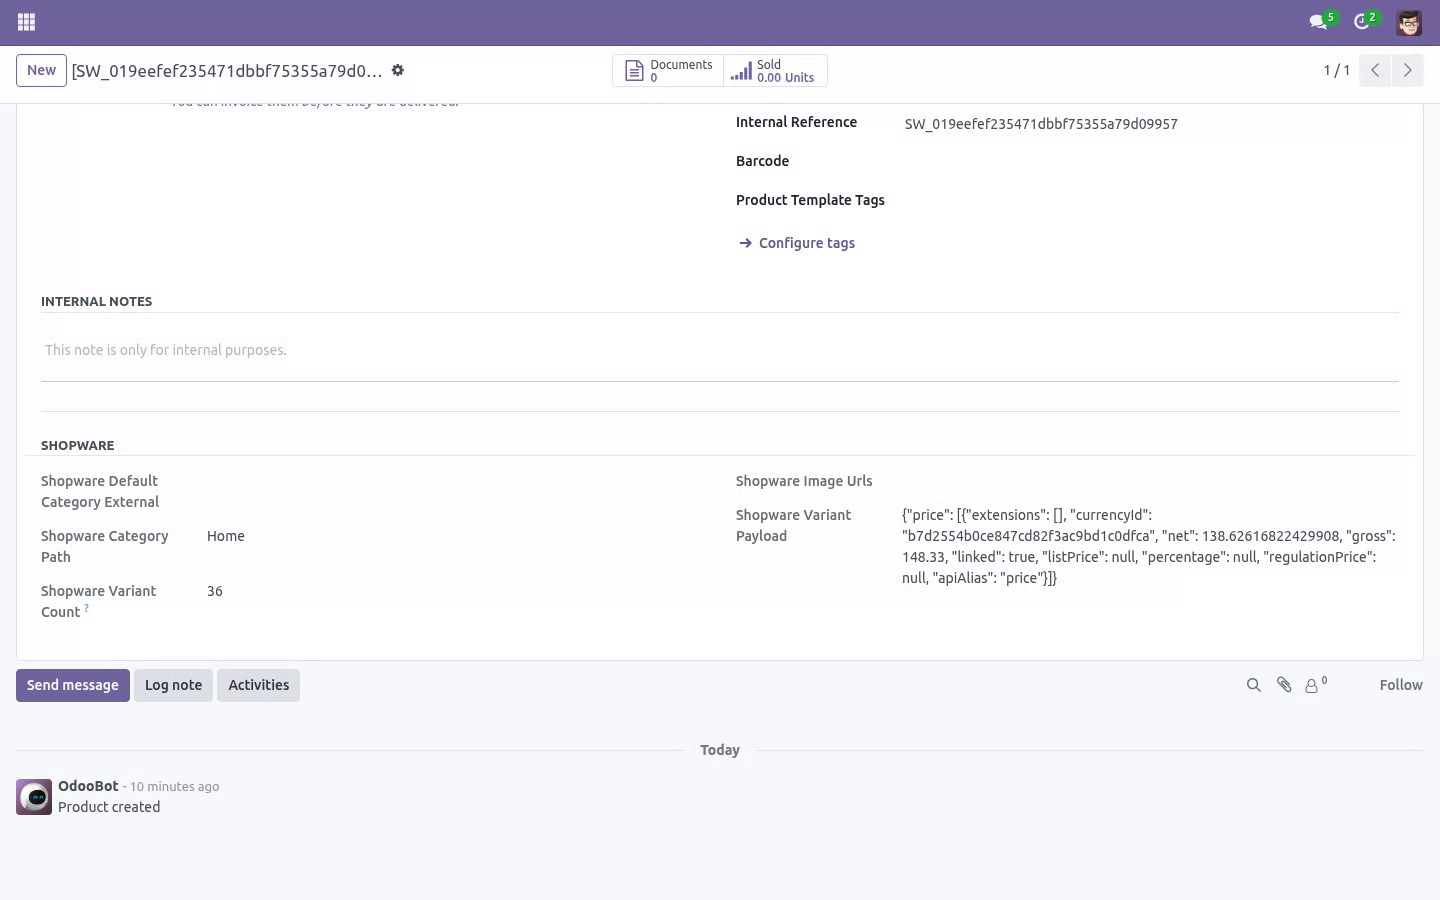
Signed webhooks — public webhook route fails closed: a delivery is accepted only with a matching HMAC-SHA256 signature and a fresh, non-replayed emitted_at. Where Shopware shows up in Odoo. The connector stays out of the way on records that have nothing to do with Shopware: Sales orders - the Shopware tab, Queue Shopware Export and Shopware Binding appear only on orders that came from Shopware, are bound to Shopware, or belong to a customer bound to Shopware. Products and contacts - the Shopware tab appears once an active Shopware connection exists; the Shopware Binding button inside it appears once the record is bound.
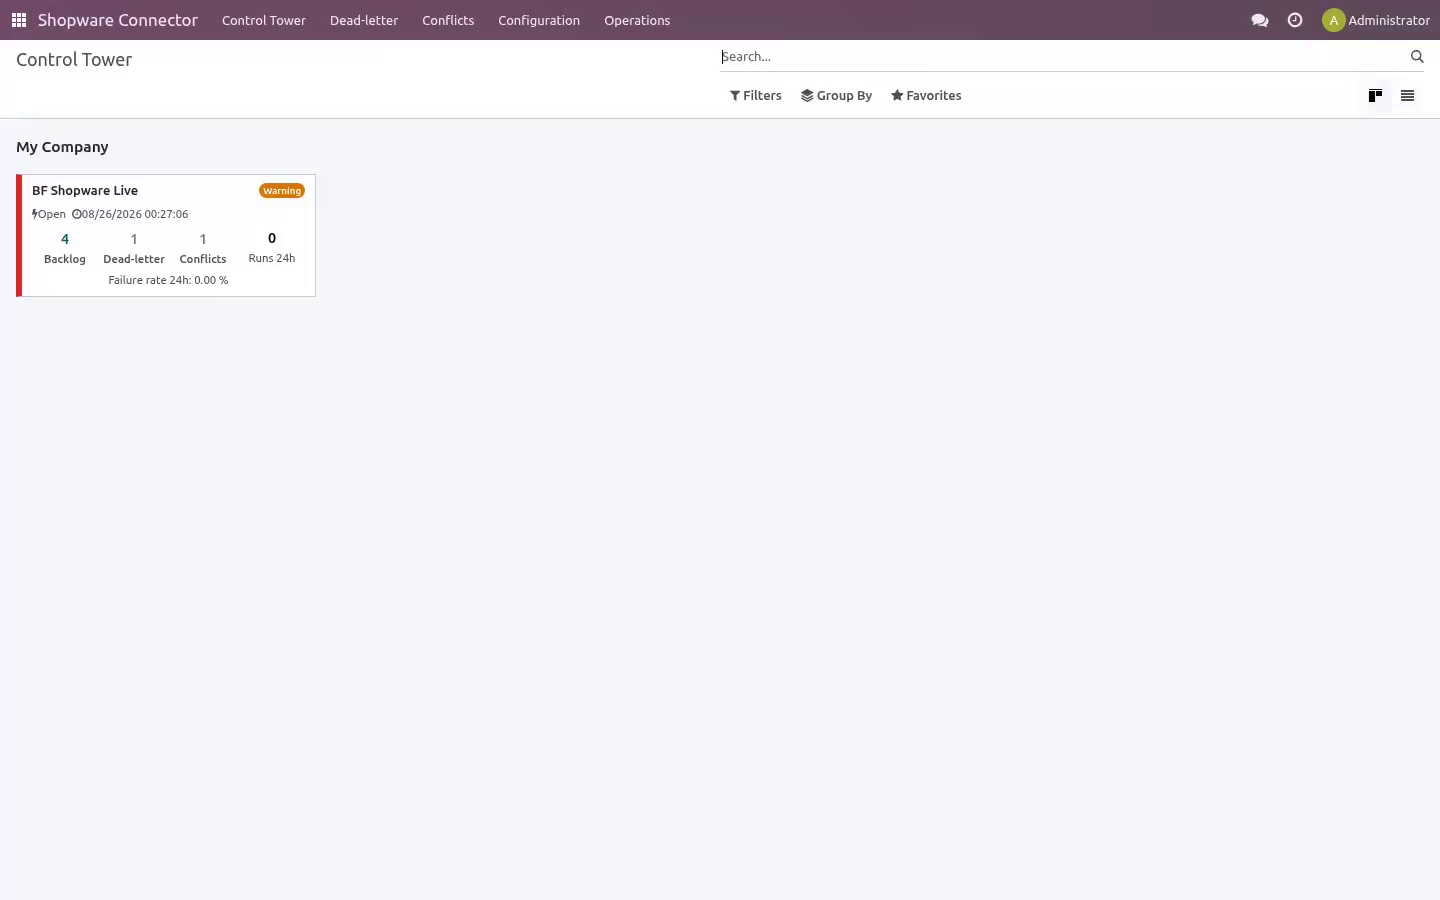
List views, the sync queue and the control tower are unchanged. Now the part most videos leave out: what this does not do. The connector reads products, customers, orders and order credit notes from your store and writes the corresponding Odoo records. Credentials are stored in admin-only fields.
In scope today: product/customer/order import, product export, order-state mapping, refund (order_slip) discovery, scheduled sync, signed webhooks. Out of scope / best-effort: tax auto-matching (off by default, name-based, never auto-creates taxes); multi-warehouse stock routing; subscription/booking order types. The complete manual is at docs dot bambooforge dot dev, the demo database is linked from the store page, and support answers within twenty-four hours. Links are in the description.
Transcript of the walkthrough (Odoo 19)
Shopware Connector / Shopware 6 Odoo Integration. Two-way Shopware 6 integration over the Admin API: products, customers, orders, refunds and stock, with HMAC-signed webhooks and a sync queue. The connector keeps Odoo and Shopware in sync over the official Shopware 6 Admin API. It covers: In the next few minutes: matching the storefront total, then step 1 — create an admin api integration in shopware, then step 2 — create the connection in odoo, then step 3 — first sync (dry-run, then live), then order status mapping.
Then what this app deliberately does not do, so you can tell before you buy whether it fits. Everything lives under Shopware Connector then Control Tower then Dead-letter then Conflicts. Matching the storefront total. A storefront charges shipping and grants discounts outside the product lines, so an order rebuilt from those lines alone is worth less than the order the customer paid for: the sale looks smaller than it was and never reconciles against the platform payout.
the shipping charge is imported as its own order line, on a clearly named service product; whatever still separates Odoo from the platform total — platform discounts, fees, rounding — is posted as a single adjustment line rather than dropped; the platform total and the remaining difference are stored on the order and shown on its connector tab; an order that still does not match within Total Tolerance raises a validation warning, so the gap is visible instead of silent. With Match Storefront Totals on the instance (on by default): Step 1 — Create an Admin API integration in Shopware. The connector authenticates as a Shopware Integration (OAuth2 client-credentials). In your Shopware 6 administration: 1.
Go to Settings ▸ System ▸ Integrations. 2. Click Add integration. 3.
Give it a Name such as Odoo, and grant it the access it needs (administrator access, or read/write on Products, Customers and Orders). 4. Save. Shopware shows the Access key ID and the Secret access key once.
5. Copy both values now — the secret is shown only at creation time. Step 2 — Create the connection in Odoo. Open Shopware Connector ▸ Configuration ▸ Instances and create a record.
A label for this store, e.g. My Live Store. Your Shopware server root, e.g. https://store.example.com.
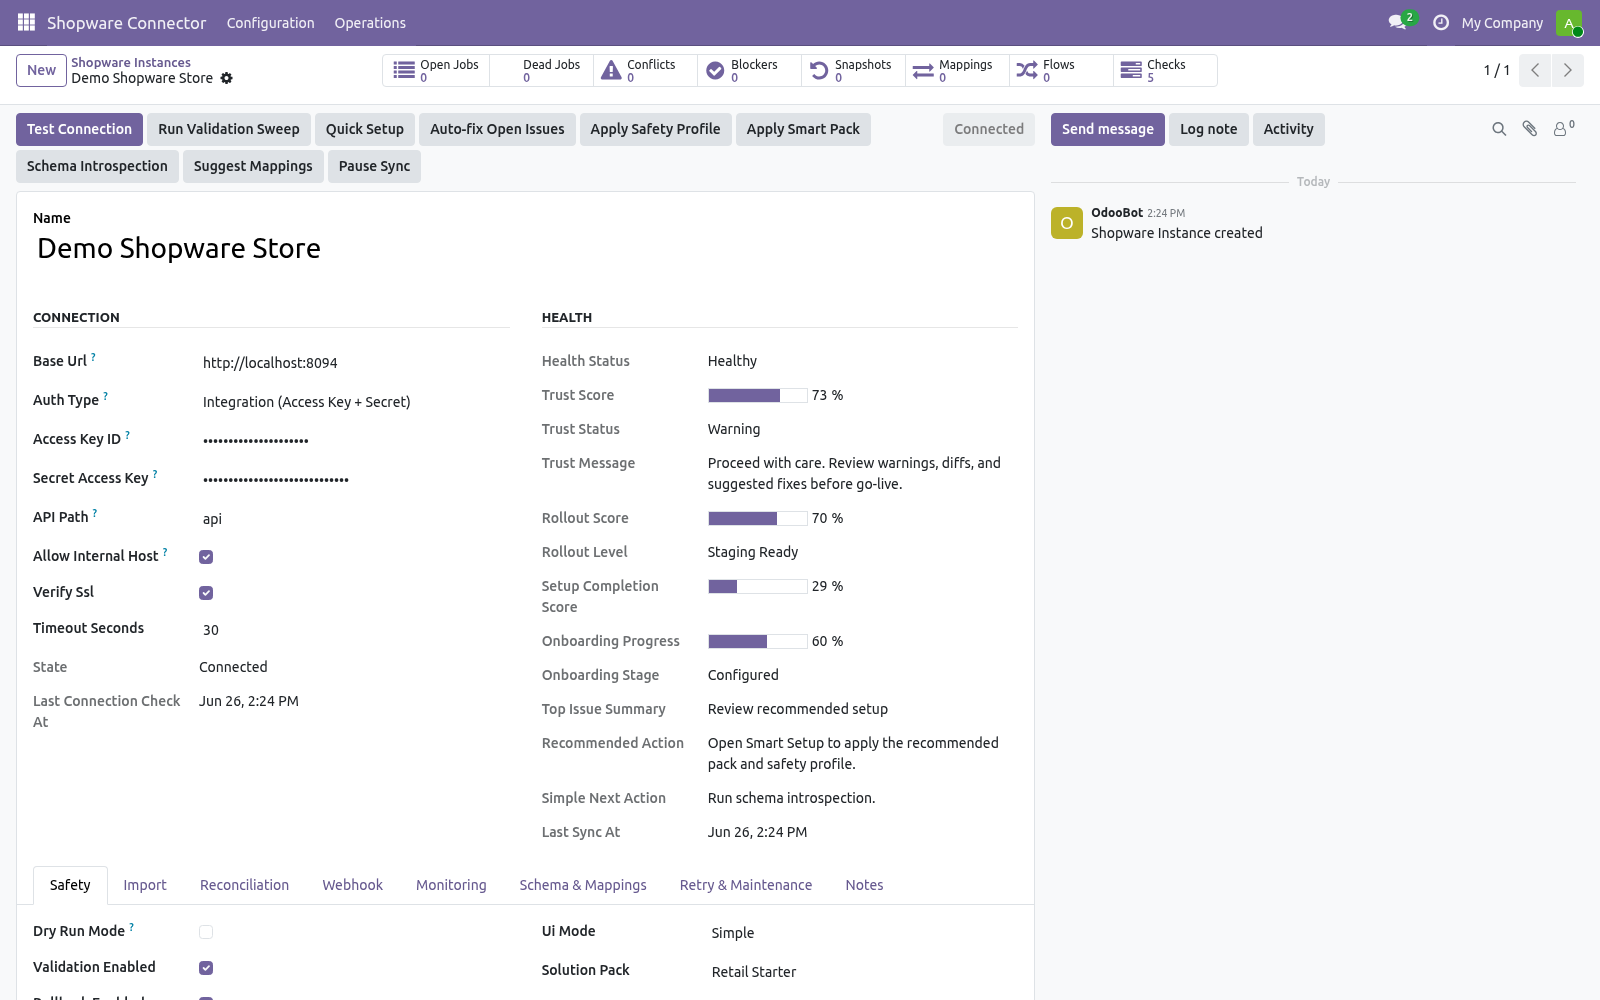
- Authentication Integration (Access Key + Secret) — Shopware Admin API OAuth2 client-credentials. - Access Key ID The integration's access key id (client_id) from Step 1 (admin-only). - Secret Access Key The integration's secret access key (client_secret) from Step 1 (admin-only). Then click Test Connection.
A green Connected state means the credentials and URL are correct, and the default order-state mapping is seeded automatically on first successful connect. If it fails, the exact error is shown on the form and recorded in Logs (see Troubleshooting). Step 3 — First sync (dry-run, then live). New instances start with Dry-run ON.
In dry-run, import and delete jobs simulate writes: instead of changing data they produce Validation Results you can review under Shopware Connector ▸ Operations ▸ Validation Results. This lets you confirm what would happen before anything is written. 1. On the instance, click Import Products (and/or Import Customers, Import Orders).
This enqueues jobs; it does not block the UI. 2. Jobs are processed by the Shopware Queue Processor scheduled action (every minute), or immediately if you run it manually from Operations ▸ Queue Jobs. 3.
Review Validation Results while still in dry-run. 4. When satisfied, open the instance, turn Dry-run OFF, and run the imports again to write the records for real. Order status mapping.
Shopware drives each order through a state machine; an order carries a stateMachineState whose technicalName (e.g. open, in_progress, completed, cancelled) identifies its current state. Under Configuration ▸ Order State Mappings each instance gets a default table that decides what happens to the Odoo sale order when an order reaches a given state: - Shopware state Default Odoo action Confirm sale order Cancel sale order Change any row to Ignore (do nothing), Keep draft, Confirm sale order or Cancel sale order. Unknown/custom states default to Ignore, so a state you have not mapped never triggers a destructive transition.
Add a row for any custom state your store introduces (use the exact technicalName). Field mapping & customization Field Mappings (Configuration) map Shopware fields to Odoo fields per model. Use Generate suggested mappings on the instance to seed the business-critical ones, then adjust. The mapping board flags fields that need attention.
Schema Fields lists the discovered Shopware fields per resource. Run Schema Introspection on the instance to refresh it from your live store. Stock / images / tax are opt-in toggles on the instance: Sync stock, Sync images (and max images), Upload images on export, Sync taxes (and auto-match taxes on import). They are off by default; turn on only what you need.
Tax auto-match never auto-creates taxes — it only links to an existing Odoo sale tax by name. Refunds: Sync refunds discovers Shopware order_slip credit notes during order import and creates draft Odoo credit notes; Auto-post refund (off by default) posts them automatically so accountants can review first. Automation (scheduled actions & webhooks). The module ships these scheduled actions (Settings ▸ Technical ▸ Scheduled Actions): - Scheduled action - Shopware Queue Processor Processes queued import/export/delete jobs.
- Shopware Reconciliation Pulls recent remote changes for enabled models. - Shopware Maintenance Recovers stale/locked jobs and trims old logs. - Shopware Flow Scheduler Turn on Auto import / Auto reconcile per model on the instance to let the scheduled actions keep things in sync hands-free. Safety features Dry-run mode — simulate writes and review Validation Results before going live.
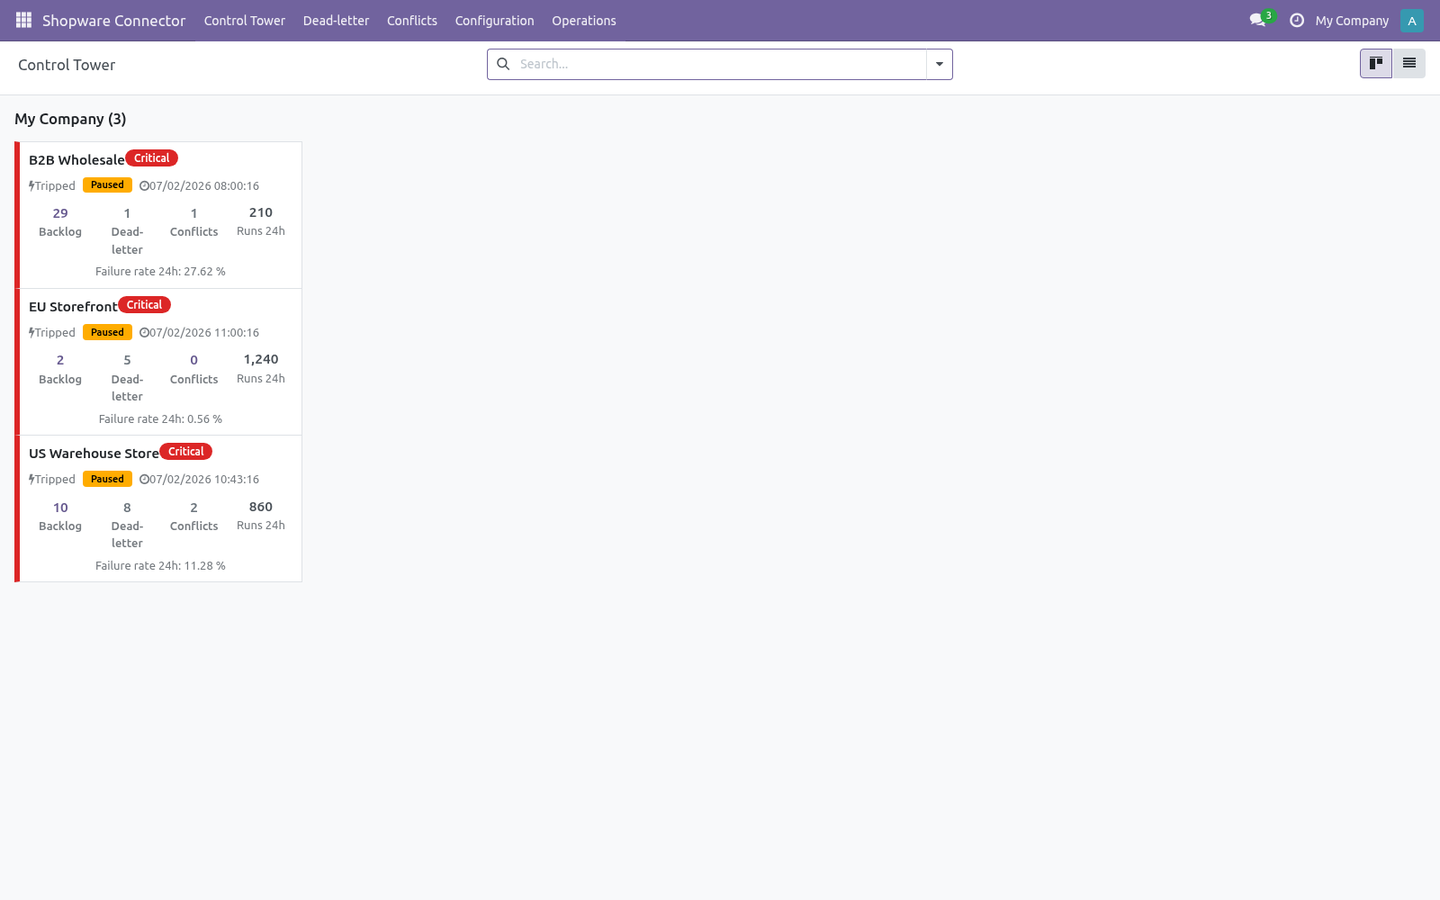
Business validation profiles — Minimal / Standard / Strict gate risky writes. Resilient queue — every remote action is a job with retry and configurable fixed/exponential back-off, plus a dead-letter state for jobs that keep failing. Circuit breaker — after repeated failures an instance auto-pauses (Tripped); the Auto Recover action reopens it once the store responds again, or click Resume. Rollback snapshots — when enabled, imports capture a snapshot so you can undo a batch from Operations ▸ Rollback Snapshots.
SSRF guard — the connector refuses internal/loopback/private hosts unless Allow internal host is explicitly enabled. Signed webhooks — public webhook route fails closed: a delivery is accepted only with a matching HMAC-SHA256 signature and a fresh, non-replayed emitted_at. Troubleshooting. For anything else, Operations ▸ Logs records every API call, payload and error with a timestamp.
- Test Connection fails with 401 Wrong Access Key ID / Secret Access Key, or the integration lacks access. Re-check Step 1 and recreate the integration if you lost the secret (it is shown only once). - "Base URL is not allowed / non-public host" Base URL points at localhost/private IP. Enable Allow internal host on the instance (test/self-hosted only).
- SSL errors on Test Connection Self-signed certificate. Use a valid cert, or turn off Verify SSL for testing only. - Orders import but never confirm The order's Shopware state is mapped to Keep draft or Ignore. Adjust Order State Mappings.
Frequently asked questions. Which versions are supported? Odoo 19.0 on the Odoo side. On the store side the connector targets the Shopware 6 Admin API (OAuth2 client-credentials).
Validate your exact build with the bundled mock first. Do I need Shopware installed to evaluate it? No. A mock Shopware Admin API ships inside, so you can install, explore and demo the full import flow before connecting a real store — point the Base URL at <your-odoo-domain>/shopware/mock_api.
Now the part most videos leave out: what this does not do. The connector reads products, customers, orders and order credit notes from your store and writes the corresponding Odoo records. Credentials are stored in admin-only fields. In scope today: product/customer/order import, product export, order-state mapping, refund (order_slip) discovery, scheduled sync, signed webhooks.
Out of scope / best-effort: tax auto-matching (off by default, name-based, never auto-creates taxes); multi-warehouse stock routing; subscription/booking order types. The complete manual is at docs dot bambooforge dot dev, the demo database is linked from the store page, and support answers within twenty-four hours. Links are in the description.
Transcript of the walkthrough (Odoo 18)
Shopware Connector / Shopware 6 Odoo Integration. Two-way Shopware 6 integration over the Admin API: products, customers, orders, refunds and stock, with HMAC-signed webhooks and a sync queue. The connector keeps Odoo and Shopware in sync over the official Shopware 6 Admin API. It covers: In the next few minutes: matching the storefront total, then step 1 — create an admin api integration in shopware, then step 2 — create the connection in odoo, then step 3 — first sync (dry-run, then live), then order status mapping.
Then what this app deliberately does not do, so you can tell before you buy whether it fits. Everything lives under Shopware Connector then Control Tower then Dead-letter then Conflicts. Matching the storefront total. A storefront charges shipping and grants discounts outside the product lines, so an order rebuilt from those lines alone is worth less than the order the customer paid for: the sale looks smaller than it was and never reconciles against the platform payout.
the shipping charge is imported as its own order line, on a clearly named service product; whatever still separates Odoo from the platform total — platform discounts, fees, rounding — is posted as a single adjustment line rather than dropped; the platform total and the remaining difference are stored on the order and shown on its connector tab; an order that still does not match within Total Tolerance raises a validation warning, so the gap is visible instead of silent. With Match Storefront Totals on the instance (on by default): Step 1 — Create an Admin API integration in Shopware. The connector authenticates as a Shopware Integration (OAuth2 client-credentials). In your Shopware 6 administration: 1.
Go to Settings ▸ System ▸ Integrations. 2. Click Add integration. 3.
Give it a Name such as Odoo, and grant it the access it needs (administrator access, or read/write on Products, Customers and Orders). 4. Save. Shopware shows the Access key ID and the Secret access key once.
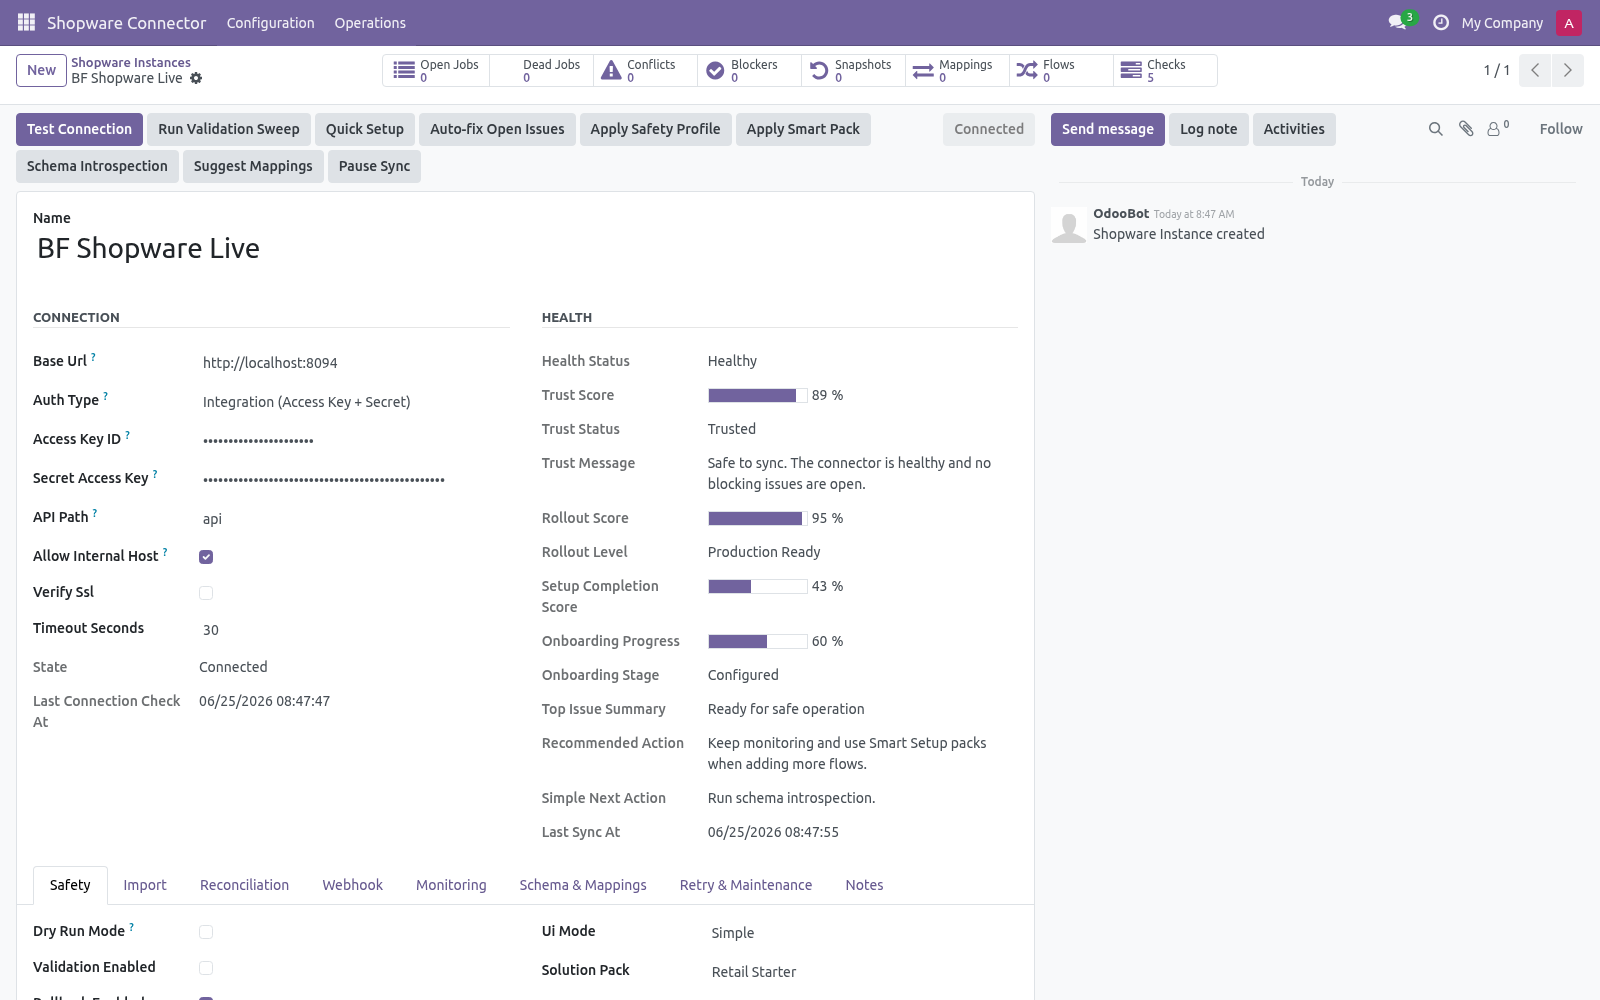
5. Copy both values now — the secret is shown only at creation time. Step 2 — Create the connection in Odoo. Open Shopware Connector ▸ Configuration ▸ Instances and create a record.
A label for this store, e.g. My Live Store. Your Shopware server root, e.g. https://store.example.com.
- Authentication Integration (Access Key + Secret) — Shopware Admin API OAuth2 client-credentials. - Access Key ID The integration's access key id (client_id) from Step 1 (admin-only). - Secret Access Key The integration's secret access key (client_secret) from Step 1 (admin-only). Then click Test Connection.
A green Connected state means the credentials and URL are correct, and the default order-state mapping is seeded automatically on first successful connect. If it fails, the exact error is shown on the form and recorded in Logs (see Troubleshooting). Step 3 — First sync (dry-run, then live). New instances start with Dry-run ON.
In dry-run, import and delete jobs simulate writes: instead of changing data they produce Validation Results you can review under Shopware Connector ▸ Operations ▸ Validation Results. This lets you confirm what would happen before anything is written. 1. On the instance, click Import Products (and/or Import Customers, Import Orders).
This enqueues jobs; it does not block the UI. 2. Jobs are processed by the Shopware Queue Processor scheduled action (every minute), or immediately if you run it manually from Operations ▸ Queue Jobs. 3.
Review Validation Results while still in dry-run. 4. When satisfied, open the instance, turn Dry-run OFF, and run the imports again to write the records for real. Order status mapping.
Shopware drives each order through a state machine; an order carries a stateMachineState whose technicalName (e.g. open, in_progress, completed, cancelled) identifies its current state. Under Configuration ▸ Order State Mappings each instance gets a default table that decides what happens to the Odoo sale order when an order reaches a given state: - Shopware state Default Odoo action Confirm sale order Cancel sale order Change any row to Ignore (do nothing), Keep draft, Confirm sale order or Cancel sale order. Unknown/custom states default to Ignore, so a state you have not mapped never triggers a destructive transition.
Add a row for any custom state your store introduces (use the exact technicalName). Field mapping & customization Field Mappings (Configuration) map Shopware fields to Odoo fields per model. Use Generate suggested mappings on the instance to seed the business-critical ones, then adjust. The mapping board flags fields that need attention.
Schema Fields lists the discovered Shopware fields per resource. Run Schema Introspection on the instance to refresh it from your live store. Stock / images / tax are opt-in toggles on the instance: Sync stock, Sync images (and max images), Upload images on export, Sync taxes (and auto-match taxes on import). They are off by default; turn on only what you need.
Tax auto-match never auto-creates taxes — it only links to an existing Odoo sale tax by name. Refunds: Sync refunds discovers Shopware order_slip credit notes during order import and creates draft Odoo credit notes; Auto-post refund (off by default) posts them automatically so accountants can review first. Automation (scheduled actions & webhooks). The module ships these scheduled actions (Settings ▸ Technical ▸ Scheduled Actions): - Scheduled action - Shopware Queue Processor Processes queued import/export/delete jobs.
- Shopware Reconciliation Pulls recent remote changes for enabled models. - Shopware Maintenance Recovers stale/locked jobs and trims old logs. - Shopware Flow Scheduler Turn on Auto import / Auto reconcile per model on the instance to let the scheduled actions keep things in sync hands-free. Safety features Dry-run mode — simulate writes and review Validation Results before going live.
Business validation profiles — Minimal / Standard / Strict gate risky writes. Resilient queue — every remote action is a job with retry and configurable fixed/exponential back-off, plus a dead-letter state for jobs that keep failing. Circuit breaker — after repeated failures an instance auto-pauses (Tripped); the Auto Recover action reopens it once the store responds again, or click Resume. Rollback snapshots — when enabled, imports capture a snapshot so you can undo a batch from Operations ▸ Rollback Snapshots.
SSRF guard — the connector refuses internal/loopback/private hosts unless Allow internal host is explicitly enabled. Signed webhooks — public webhook route fails closed: a delivery is accepted only with a matching HMAC-SHA256 signature and a fresh, non-replayed emitted_at. Troubleshooting. For anything else, Operations ▸ Logs records every API call, payload and error with a timestamp.
- Test Connection fails with 401 Wrong Access Key ID / Secret Access Key, or the integration lacks access. Re-check Step 1 and recreate the integration if you lost the secret (it is shown only once). - "Base URL is not allowed / non-public host" Base URL points at localhost/private IP. Enable Allow internal host on the instance (test/self-hosted only).
- SSL errors on Test Connection Self-signed certificate. Use a valid cert, or turn off Verify SSL for testing only. - Orders import but never confirm The order's Shopware state is mapped to Keep draft or Ignore. Adjust Order State Mappings.
Frequently asked questions. Which versions are supported? Odoo 18.0 on the Odoo side. On the store side the connector targets the Shopware 6 Admin API (OAuth2 client-credentials).
Validate your exact build with the bundled mock first. Do I need Shopware installed to evaluate it? No. A mock Shopware Admin API ships inside, so you can install, explore and demo the full import flow before connecting a real store — point the Base URL at <your-odoo-domain>/shopware/mock_api.
Now the part most videos leave out: what this does not do. The connector reads products, customers, orders and order credit notes from your store and writes the corresponding Odoo records. Credentials are stored in admin-only fields. In scope today: product/customer/order import, product export, order-state mapping, refund (order_slip) discovery, scheduled sync, signed webhooks.
Out of scope / best-effort: tax auto-matching (off by default, name-based, never auto-creates taxes); multi-warehouse stock routing; subscription/booking order types. The complete manual is at docs dot bambooforge dot dev, the demo database is linked from the store page, and support answers within twenty-four hours. Links are in the description.
Transcript of the walkthrough (Odoo 17)
Shopware Connector / Shopware 6 Odoo Integration. Two-way Shopware 6 integration over the Admin API: products, customers, orders, refunds and stock, with HMAC-signed webhooks and a sync queue. The connector keeps Odoo and Shopware in sync over the official Shopware 6 Admin API. It covers: In the next few minutes: matching the storefront total, then step 1 — create an admin api integration in shopware, then step 2 — create the connection in odoo, then step 3 — first sync (dry-run, then live), then order status mapping.
Then what this app deliberately does not do, so you can tell before you buy whether it fits. Everything lives under Shopware Connector then Control Tower then Dead-letter then Conflicts. Matching the storefront total. A storefront charges shipping and grants discounts outside the product lines, so an order rebuilt from those lines alone is worth less than the order the customer paid for: the sale looks smaller than it was and never reconciles against the platform payout.
the shipping charge is imported as its own order line, on a clearly named service product; whatever still separates Odoo from the platform total — platform discounts, fees, rounding — is posted as a single adjustment line rather than dropped; the platform total and the remaining difference are stored on the order and shown on its connector tab; an order that still does not match within Total Tolerance raises a validation warning, so the gap is visible instead of silent. With Match Storefront Totals on the instance (on by default): Step 1 — Create an Admin API integration in Shopware. The connector authenticates as a Shopware Integration (OAuth2 client-credentials). In your Shopware 6 administration: 1.
Go to Settings ▸ System ▸ Integrations. 2. Click Add integration. 3.
Give it a Name such as Odoo, and grant it the access it needs (administrator access, or read/write on Products, Customers and Orders). 4. Save. Shopware shows the Access key ID and the Secret access key once.
5. Copy both values now — the secret is shown only at creation time. Step 2 — Create the connection in Odoo. Open Shopware Connector ▸ Configuration ▸ Instances and create a record.
A label for this store, e.g. My Live Store. Your Shopware server root, e.g. https://store.example.com.
- Authentication Integration (Access Key + Secret) — Shopware Admin API OAuth2 client-credentials. - Access Key ID The integration's access key id (client_id) from Step 1 (admin-only). - Secret Access Key The integration's secret access key (client_secret) from Step 1 (admin-only). Then click Test Connection.
A green Connected state means the credentials and URL are correct, and the default order-state mapping is seeded automatically on first successful connect. If it fails, the exact error is shown on the form and recorded in Logs (see Troubleshooting). Step 3 — First sync (dry-run, then live). New instances start with Dry-run ON.
In dry-run, import and delete jobs simulate writes: instead of changing data they produce Validation Results you can review under Shopware Connector ▸ Operations ▸ Validation Results. This lets you confirm what would happen before anything is written. 1. On the instance, click Import Products (and/or Import Customers, Import Orders).
This enqueues jobs; it does not block the UI. 2. Jobs are processed by the Shopware Queue Processor scheduled action (every minute), or immediately if you run it manually from Operations ▸ Queue Jobs. 3.
Review Validation Results while still in dry-run. 4. When satisfied, open the instance, turn Dry-run OFF, and run the imports again to write the records for real. Order status mapping.
Shopware drives each order through a state machine; an order carries a stateMachineState whose technicalName (e.g. open, in_progress, completed, cancelled) identifies its current state. Under Configuration ▸ Order State Mappings each instance gets a default table that decides what happens to the Odoo sale order when an order reaches a given state: - Shopware state Default Odoo action Confirm sale order Cancel sale order Change any row to Ignore (do nothing), Keep draft, Confirm sale order or Cancel sale order. Unknown/custom states default to Ignore, so a state you have not mapped never triggers a destructive transition.
Add a row for any custom state your store introduces (use the exact technicalName). Field mapping & customization Field Mappings (Configuration) map Shopware fields to Odoo fields per model. Use Generate suggested mappings on the instance to seed the business-critical ones, then adjust. The mapping board flags fields that need attention.
Schema Fields lists the discovered Shopware fields per resource. Run Schema Introspection on the instance to refresh it from your live store. Stock / images / tax are opt-in toggles on the instance: Sync stock, Sync images (and max images), Upload images on export, Sync taxes (and auto-match taxes on import). They are off by default; turn on only what you need.
Tax auto-match never auto-creates taxes — it only links to an existing Odoo sale tax by name. Refunds: Sync refunds discovers Shopware order_slip credit notes during order import and creates draft Odoo credit notes; Auto-post refund (off by default) posts them automatically so accountants can review first. Automation (scheduled actions & webhooks). The module ships these scheduled actions (Settings ▸ Technical ▸ Scheduled Actions): - Scheduled action - Shopware Queue Processor Processes queued import/export/delete jobs.
- Shopware Reconciliation Pulls recent remote changes for enabled models. - Shopware Maintenance Recovers stale/locked jobs and trims old logs. - Shopware Flow Scheduler Turn on Auto import / Auto reconcile per model on the instance to let the scheduled actions keep things in sync hands-free. Safety features Dry-run mode — simulate writes and review Validation Results before going live.
Business validation profiles — Minimal / Standard / Strict gate risky writes. Resilient queue — every remote action is a job with retry and configurable fixed/exponential back-off, plus a dead-letter state for jobs that keep failing. Circuit breaker — after repeated failures an instance auto-pauses (Tripped); the Auto Recover action reopens it once the store responds again, or click Resume. Rollback snapshots — when enabled, imports capture a snapshot so you can undo a batch from Operations ▸ Rollback Snapshots.
SSRF guard — the connector refuses internal/loopback/private hosts unless Allow internal host is explicitly enabled. Signed webhooks — public webhook route fails closed: a delivery is accepted only with a matching HMAC-SHA256 signature and a fresh, non-replayed emitted_at. Troubleshooting. For anything else, Operations ▸ Logs records every API call, payload and error with a timestamp.
- Test Connection fails with 401 Wrong Access Key ID / Secret Access Key, or the integration lacks access. Re-check Step 1 and recreate the integration if you lost the secret (it is shown only once). - "Base URL is not allowed / non-public host" Base URL points at localhost/private IP. Enable Allow internal host on the instance (test/self-hosted only).
- SSL errors on Test Connection Self-signed certificate. Use a valid cert, or turn off Verify SSL for testing only. - Orders import but never confirm The order's Shopware state is mapped to Keep draft or Ignore. Adjust Order State Mappings.
Frequently asked questions. Which versions are supported? Odoo 17.0 on the Odoo side. On the store side the connector targets the Shopware 6 Admin API (OAuth2 client-credentials).
Validate your exact build with the bundled mock first. Do I need Shopware installed to evaluate it? No. A mock Shopware Admin API ships inside, so you can install, explore and demo the full import flow before connecting a real store — point the Base URL at <your-odoo-domain>/shopware/mock_api.
Now the part most videos leave out: what this does not do. The connector reads products, customers, orders and order credit notes from your store and writes the corresponding Odoo records. Credentials are stored in admin-only fields. In scope today: product/customer/order import, product export, order-state mapping, refund (order_slip) discovery, scheduled sync, signed webhooks.
Out of scope / best-effort: tax auto-matching (off by default, name-based, never auto-creates taxes); multi-warehouse stock routing; subscription/booking order types. The complete manual is at docs dot bambooforge dot dev, the demo database is linked from the store page, and support answers within twenty-four hours. Links are in the description.
Transcript of the walkthrough (Odoo 16)
Shopware Connector / Shopware 6 Odoo Integration. Two-way Shopware 6 integration over the Admin API: products, customers, orders, refunds and stock, with HMAC-signed webhooks and a sync queue. The connector keeps Odoo and Shopware in sync over the official Shopware 6 Admin API. It covers: In the next few minutes: matching the storefront total, then step 1 — create an admin api integration in shopware, then step 2 — create the connection in odoo, then step 3 — first sync (dry-run, then live), then order status mapping.
Then what this app deliberately does not do, so you can tell before you buy whether it fits. Everything lives under Shopware Connector then Control Tower then Dead-letter then Conflicts. Matching the storefront total. A storefront charges shipping and grants discounts outside the product lines, so an order rebuilt from those lines alone is worth less than the order the customer paid for: the sale looks smaller than it was and never reconciles against the platform payout.
the shipping charge is imported as its own order line, on a clearly named service product; whatever still separates Odoo from the platform total — platform discounts, fees, rounding — is posted as a single adjustment line rather than dropped; the platform total and the remaining difference are stored on the order and shown on its connector tab; an order that still does not match within Total Tolerance raises a validation warning, so the gap is visible instead of silent. With Match Storefront Totals on the instance (on by default): Step 1 — Create an Admin API integration in Shopware. The connector authenticates as a Shopware Integration (OAuth2 client-credentials). In your Shopware 6 administration: 1.
Go to Settings ▸ System ▸ Integrations. 2. Click Add integration. 3.
Give it a Name such as Odoo, and grant it the access it needs (administrator access, or read/write on Products, Customers and Orders). 4. Save. Shopware shows the Access key ID and the Secret access key once.
5. Copy both values now — the secret is shown only at creation time. Step 2 — Create the connection in Odoo. Open Shopware Connector ▸ Configuration ▸ Instances and create a record.
A label for this store, e.g. My Live Store. Your Shopware server root, e.g. https://store.example.com.
- Authentication Integration (Access Key + Secret) — Shopware Admin API OAuth2 client-credentials. - Access Key ID The integration's access key id (client_id) from Step 1 (admin-only). - Secret Access Key The integration's secret access key (client_secret) from Step 1 (admin-only). Then click Test Connection.
A green Connected state means the credentials and URL are correct, and the default order-state mapping is seeded automatically on first successful connect. If it fails, the exact error is shown on the form and recorded in Logs (see Troubleshooting). Step 3 — First sync (dry-run, then live). New instances start with Dry-run ON.
In dry-run, import and delete jobs simulate writes: instead of changing data they produce Validation Results you can review under Shopware Connector ▸ Operations ▸ Validation Results. This lets you confirm what would happen before anything is written. 1. On the instance, click Import Products (and/or Import Customers, Import Orders).
This enqueues jobs; it does not block the UI. 2. Jobs are processed by the Shopware Queue Processor scheduled action (every minute), or immediately if you run it manually from Operations ▸ Queue Jobs. 3.
Review Validation Results while still in dry-run. 4. When satisfied, open the instance, turn Dry-run OFF, and run the imports again to write the records for real. Order status mapping.
Shopware drives each order through a state machine; an order carries a stateMachineState whose technicalName (e.g. open, in_progress, completed, cancelled) identifies its current state. Under Configuration ▸ Order State Mappings each instance gets a default table that decides what happens to the Odoo sale order when an order reaches a given state: - Shopware state Default Odoo action Confirm sale order Cancel sale order Change any row to Ignore (do nothing), Keep draft, Confirm sale order or Cancel sale order. Unknown/custom states default to Ignore, so a state you have not mapped never triggers a destructive transition.
Add a row for any custom state your store introduces (use the exact technicalName). Field mapping & customization Field Mappings (Configuration) map Shopware fields to Odoo fields per model. Use Generate suggested mappings on the instance to seed the business-critical ones, then adjust. The mapping board flags fields that need attention.
Schema Fields lists the discovered Shopware fields per resource. Run Schema Introspection on the instance to refresh it from your live store. Stock / images / tax are opt-in toggles on the instance: Sync stock, Sync images (and max images), Upload images on export, Sync taxes (and auto-match taxes on import). They are off by default; turn on only what you need.
Tax auto-match never auto-creates taxes — it only links to an existing Odoo sale tax by name. Refunds: Sync refunds discovers Shopware order_slip credit notes during order import and creates draft Odoo credit notes; Auto-post refund (off by default) posts them automatically so accountants can review first. Automation (scheduled actions & webhooks). The module ships these scheduled actions (Settings ▸ Technical ▸ Scheduled Actions): - Scheduled action - Shopware Queue Processor Processes queued import/export/delete jobs.
- Shopware Reconciliation Pulls recent remote changes for enabled models. - Shopware Maintenance Recovers stale/locked jobs and trims old logs. - Shopware Flow Scheduler Turn on Auto import / Auto reconcile per model on the instance to let the scheduled actions keep things in sync hands-free. Safety features Dry-run mode — simulate writes and review Validation Results before going live.
Business validation profiles — Minimal / Standard / Strict gate risky writes. Resilient queue — every remote action is a job with retry and configurable fixed/exponential back-off, plus a dead-letter state for jobs that keep failing. Circuit breaker — after repeated failures an instance auto-pauses (Tripped); the Auto Recover action reopens it once the store responds again, or click Resume. Rollback snapshots — when enabled, imports capture a snapshot so you can undo a batch from Operations ▸ Rollback Snapshots.
SSRF guard — the connector refuses internal/loopback/private hosts unless Allow internal host is explicitly enabled. Signed webhooks — public webhook route fails closed: a delivery is accepted only with a matching HMAC-SHA256 signature and a fresh, non-replayed emitted_at. Troubleshooting. For anything else, Operations ▸ Logs records every API call, payload and error with a timestamp.
- Test Connection fails with 401 Wrong Access Key ID / Secret Access Key, or the integration lacks access. Re-check Step 1 and recreate the integration if you lost the secret (it is shown only once). - "Base URL is not allowed / non-public host" Base URL points at localhost/private IP. Enable Allow internal host on the instance (test/self-hosted only).
- SSL errors on Test Connection Self-signed certificate. Use a valid cert, or turn off Verify SSL for testing only. - Orders import but never confirm The order's Shopware state is mapped to Keep draft or Ignore. Adjust Order State Mappings.
Frequently asked questions. Which versions are supported? Odoo 17.0 on the Odoo side. On the store side the connector targets the Shopware 6 Admin API (OAuth2 client-credentials).
Validate your exact build with the bundled mock first. Do I need Shopware installed to evaluate it? No. A mock Shopware Admin API ships inside, so you can install, explore and demo the full import flow before connecting a real store — point the Base URL at <your-odoo-domain>/shopware/mock_api.
Now the part most videos leave out: what this does not do. The connector reads products, customers, orders and order credit notes from your store and writes the corresponding Odoo records. Credentials are stored in admin-only fields. In scope today: product/customer/order import, product export, order-state mapping, refund (order_slip) discovery, scheduled sync, signed webhooks.
Out of scope / best-effort: tax auto-matching (off by default, name-based, never auto-creates taxes); multi-warehouse stock routing; subscription/booking order types. The complete manual is at docs dot bambooforge dot dev, the demo database is linked from the store page, and support answers within twenty-four hours. Links are in the description.
Key facts
- What it is
- Two-way Shopware 6 integration over the Admin API: products, customers, orders, refunds and stock, with HMAC-signed webhooks and a sync queue.
- For
- eCommerce
- Odoo versions
- 16.0, 17.0, 18.0, 19.0, 20.0 - Community and Enterprise
- Runs on
- Odoo.sh or Odoo you host yourself - not Odoo Online, which accepts no third-party apps
- Price
- 199 EUR, one-time, on the Odoo Apps Store
- Technical name
- bambooforge_shopware_connector
- Run for real
- Tested for real against Shopware 6.7: 16 products, 4 customers and 3 orders placed through the Store API arrived in Odoo at 91.96 each, 23 sync jobs, 0 errors.
- Not for
- The connector reads products, customers, orders and order credit notes from your store and writes the corresponding Odoo records. Credentials are stored in admin-only fields.; In scope today: product/customer/order import, product export, order-state mapping, refund (order_slip) discovery, scheduled sync, signed webhooks.; Out of scope / best-effort: tax auto-matching (off by default, name-based, never auto-creates taxes); multi-warehouse stock routing; subscription/booking order types.
- Manual last updated
- 2026-10-15
Shopware Connector | Shopware 6 Odoo Integration
A two-way bridge between Odoo 20 and your Shopware 6 store: import products, customers and orders, push product changes back, and reconcile refunds — with a resilient job queue, dry-run safety, validation and rollback so you stay in control.
This page is the complete manual. If you follow it top to bottom you can install, connect, run your first sync, automate it, and fix the common issues without contacting support.
Matching the storefront total
A storefront charges shipping and grants discounts outside the product lines, so an order rebuilt from those lines alone is worth less than the order the customer paid for: the sale looks smaller than it was and never reconciles against the platform payout.
With Match Storefront Totals on the instance (on by default):
the shipping charge is imported as its own order line, on a clearly named service product;
whatever still separates Odoo from the platform total — platform discounts, fees, rounding — is posted as a single adjustment line rather than dropped;
the platform total and the remaining difference are stored on the order and shown on its connector tab;
an order that still does not match within Total Tolerance raises a validation warning, so the gap is visible instead of silent.
Imported lines deliberately carry no Odoo tax: the storefront has already computed tax and it is kept on the order's own tax amount field. Switch the option off if you would rather Odoo recompute everything from your own price lists and tax rules.
Overview
The connector keeps Odoo and Shopware in sync over the official Shopware 6 Admin API. It covers:
Products — import Shopware products (with variants, options and images) into Odoo product templates (optionally with stock, images and tax class), and export Odoo product changes back to the store.
Customers — import Shopware customers (and their billing/shipping addresses) into Odoo contacts.
Orders — import Shopware orders into Odoo sale orders, mapping each order's Shopware state-machine state to a sale-order action (keep draft, confirm, cancel, or ignore).
Refunds — optionally discover Shopware order credit notes (order_slip) and create matching draft customer credit notes in Odoo.
Direction of sync: Odoo ↔ Shopware (import is the primary flow; product export and webhook-driven updates are supported).
Every remote call goes through a queue: nothing is written to Odoo until a job runs, jobs retry with back-off on transient failures, and a circuit breaker pauses an instance that keeps failing.
Tested against the real thing
Automated tests run against a bundled mock store on every release; the line below is the part no mock can give you - the connector pointed at the real platform, with real records and real order totals.
Tested for real against Shopware 6.7: 16 products, 4 customers and 3 orders placed through the Store API arrived in Odoo at 91.96 each, 23 sync jobs, 0 errors.
Requirements
Odoo: 20.0, Community or Enterprise.
Shopware: a Shopware 6 store exposing the Admin API (OAuth2 client-credentials). Shopware must be reachable from the Odoo server.
Python: no extra libraries beyond a standard Odoo 20 install.
Odoo access: any internal user can use the connector screens. Shopware credentials are stored in system-only fields, so only the Settings / Administration user can read or change the Access Key ID and Secret Access Key.
Network: outbound HTTPS from Odoo to your store. By default the connector refuses internal/loopback/private hosts as an SSRF safeguard (see Safety features).
Installation
Copy bambooforge_shopware_connector into your Odoo addons path.
Restart the Odoo service.
Open Apps, click Update Apps List, search for Shopware, and press Activate / Install. Dependencies (Sales, Contacts, Invoicing) install automatically.
No Shopware store is required to evaluate the connector: a mock Shopware Admin API ships inside the module, so you can install, explore and run the full import flow against sample data before pointing it at a real store. Point an instance's Base URL at <your-odoo-domain>/shopware/mock_api (auth type Integration, any access key and secret) to exercise the full flow without a live store.
Step 1 — Create an Admin API integration in Shopware
The connector authenticates as a Shopware Integration (OAuth2 client-credentials). In your Shopware 6 administration:
Go to Settings ▸ System ▸ Integrations.
Click Add integration.
Give it a Name such as Odoo, and grant it the access it needs (administrator access, or read/write on Products, Customers and Orders).
Save. Shopware shows the Access key ID and the Secret access key once.
Copy both values now — the secret is shown only at creation time.
Optional, for real-time updates, you will also configure a webhook later (see Automation).
Step 2 — Create the connection in Odoo
Open Shopware Connector ▸ Configuration ▸ Instances and create a record.
Key fields:
Field |
What to enter |
|---|---|
Name |
A label for this store, e.g. My Live Store. |
Base URL |
Your Shopware server root, e.g. https://store.example.com. |
Authentication |
Integration (Access Key + Secret) — Shopware Admin API OAuth2 client-credentials. |
Access Key ID |
The integration's access key id (client_id) from Step 1 (admin-only). |
Secret Access Key |
The integration's secret access key (client_secret) from Step 1 (admin-only). |
API Path |
Leave the default api unless your store differs. |
Verify SSL |
Keep on for production. Turn off only for self-signed test certificates. |
Allow internal host |
Off by default. Turn on only to reach a store on localhost or a private network (lowers the SSRF guard — see Safety features). |
Then click Test Connection. A green Connected state means the credentials and URL are correct, and the default order-state mapping is seeded automatically on first successful connect. If it fails, the exact error is shown on the form and recorded in Logs (see Troubleshooting).
Tip: use Quick Setup (button on the instance) to pick a solution pack (catalog only, B2C full sync, …), seed default field mappings and order-state rules, and apply a recommended schedule in one step.
Step 3 — First sync (dry-run, then live)
New instances start with Dry-run ON. In dry-run, import and delete jobs simulate writes: instead of changing data they produce Validation Results you can review under Shopware Connector ▸ Operations ▸ Validation Results. This lets you confirm what would happen before anything is written.
To run a first import:
On the instance, click Import Products (and/or Import Customers, Import Orders). This enqueues jobs; it does not block the UI.
Jobs are processed by the Shopware Queue Processor scheduled action (every minute), or immediately if you run it manually from Operations ▸ Queue Jobs.
Review Validation Results while still in dry-run.
When satisfied, open the instance, turn Dry-run OFF, and run the imports again to write the records for real.
Imported records land in the standard Odoo apps: Sales ▸ Products, Contacts, and Sales ▸ Orders. Each carries its Shopware reference so re-imports update the same record instead of duplicating it.
Order status mapping
Shopware drives each order through a state machine; an order carries a stateMachineState whose technicalName (e.g. open, in_progress, completed, cancelled) identifies its current state. Under Configuration ▸ Order State Mappings each instance gets a default table that decides what happens to the Odoo sale order when an order reaches a given state:
Shopware state |
Default Odoo action |
|---|---|
open |
Keep draft |
in_progress |
Confirm sale order |
completed |
Confirm sale order |
cancelled |
Cancel sale order |
Change any row to Ignore (do nothing), Keep draft, Confirm sale order or Cancel sale order. Unknown/custom states default to Ignore, so a state you have not mapped never triggers a destructive transition. Add a row for any custom state your store introduces (use the exact technicalName).
Field mapping & customization
Field Mappings (Configuration) map Shopware fields to Odoo fields per model. Use Generate suggested mappings on the instance to seed the business-critical ones, then adjust. The mapping board flags fields that need attention.
Schema Fields lists the discovered Shopware fields per resource. Run Schema Introspection on the instance to refresh it from your live store.
Stock / images / tax are opt-in toggles on the instance: Sync stock, Sync images (and max images), Upload images on export, Sync taxes (and auto-match taxes on import). They are off by default; turn on only what you need. Tax auto-match never auto-creates taxes — it only links to an existing Odoo sale tax by name.
Refunds: Sync refunds discovers Shopware order_slip credit notes during order import and creates draft Odoo credit notes; Auto-post refund (off by default) posts them automatically so accountants can review first.
Automation (scheduled actions & webhooks)
The module ships these scheduled actions (Settings ▸ Technical ▸ Scheduled Actions):
Scheduled action |
Default |
Purpose |
|---|---|---|
Shopware Queue Processor |
every 1 min |
Processes queued import/export/delete jobs. |
Shopware Reconciliation |
every 15 min |
Pulls recent remote changes for enabled models. |
Shopware Maintenance |
every 1 hr |
Recovers stale/locked jobs and trims old logs. |
Shopware Flow Scheduler |
every 5 min |
Runs scheduled sync flows. |
Shopware Flow Metrics |
every 1 hr |
Aggregates flow-run metrics. |
Shopware Auto Recover |
every 15 min |
Reopens a tripped circuit breaker once the store is healthy. |
Turn on Auto import / Auto reconcile per model on the instance to let the scheduled actions keep things in sync hands-free.
Real-time webhooks (optional): point a Shopware webhook subscriber at the connector's delivery URL so order, product and customer changes are pushed to Odoo as they happen:
Delivery URL: https://<your-odoo-domain>/shopware/webhook
Signature: each delivery must carry an X-Shopware-Signature header — the HMAC-SHA256 of the raw request body keyed with the instance Webhook Secret (admin-only field on the instance). The signed body must include an emitted_at timestamp for replay protection.
Odoo verifies the HMAC-SHA256 signature on each delivery, rejects stale or duplicate deliveries, and enqueues a safe import. Without webhooks the scheduled reconciliation still keeps data current.
Safety features
Dry-run mode — simulate writes and review Validation Results before going live.
Business validation profiles — Minimal / Standard / Strict gate risky writes.
Resilient queue — every remote action is a job with retry and configurable fixed/exponential back-off, plus a dead-letter state for jobs that keep failing.
Circuit breaker — after repeated failures an instance auto-pauses (Tripped); the Auto Recover action reopens it once the store responds again, or click Resume.
Rollback snapshots — when enabled, imports capture a snapshot so you can undo a batch from Operations ▸ Rollback Snapshots.
SSRF guard — the connector refuses internal/loopback/private hosts unless Allow internal host is explicitly enabled.
Signed webhooks — public webhook route fails closed: a delivery is accepted only with a matching HMAC-SHA256 signature and a fresh, non-replayed emitted_at.
Where Shopware shows up in Odoo
The connector stays out of the way on records that have nothing to do with Shopware:
Sales orders - the Shopware tab, Queue Shopware Export and Shopware Binding appear only on orders that came from Shopware, are bound to Shopware, or belong to a customer bound to Shopware.
Products and contacts - the Shopware tab appears once an active Shopware connection exists; the Shopware Binding button inside it appears once the record is bound.
List views, the sync queue and the control tower are unchanged.
Troubleshooting
Symptom |
Cause and fix |
|---|---|
Test Connection fails with 401 |
Wrong Access Key ID / Secret Access Key, or the integration lacks access. Re-check Step 1 and recreate the integration if you lost the secret (it is shown only once). |
"Base URL is not allowed / non-public host" |
Base URL points at localhost/private IP. Enable Allow internal host on the instance (test/self-hosted only). |
SSL errors on Test Connection |
Self-signed certificate. Use a valid cert, or turn off Verify SSL for testing only. |
Orders import but never confirm |
The order's Shopware state is mapped to Keep draft or Ignore. Adjust Order State Mappings. |
Jobs stay in Pending |
The Queue Processor is off or the instance is paused. Check Scheduled Actions is active and the instance is not Paused. |
Instance shows Tripped |
Circuit breaker tripped after repeated failures. Fix the store/credentials; Auto Recover reopens it after the cooldown, or click Resume. |
Webhook returns 401 Invalid signature |
The X-Shopware-Signature HMAC does not match. Confirm the subscriber signs the raw body with the instance Webhook Secret using HMAC-SHA256. |
Webhook returns 400 stale / 409 duplicate |
The signed emitted_at is missing/too old/in the future, or the same signature was already delivered. Sync the clocks on both hosts and do not resend captured deliveries. |
Records imported twice |
Imports are keyed by the Shopware reference, so this should not happen. If it does, check that two instances do not point at the same store. |
Nothing happens after Import |
You are in Dry-run. Review Validation Results, then turn dry-run off and re-run. |
For anything else, Operations ▸ Logs records every API call, payload and error with a timestamp.
Frequently asked questions
Which versions are supported? Odoo 20.0 on the Odoo side. On the store side the connector targets the Shopware 6 Admin API (OAuth2 client-credentials). Validate your exact build with the bundled mock first.
Do I need Shopware installed to evaluate it? No. A mock Shopware Admin API ships inside, so you can install, explore and demo the full import flow before connecting a real store — point the Base URL at <your-odoo-domain>/shopware/mock_api.
How does authentication work? Create a Shopware Integration under Settings ▸ System ▸ Integrations to get an Access Key ID and Secret Access Key. The connector exchanges them for a short-lived bearer token via OAuth2 client-credentials and refreshes it automatically.
How does real-time sync work? Point a Shopware webhook subscriber at /shopware/webhook and sign each delivery with the shared Webhook Secret (HMAC-SHA256 over the raw body, with an emitted_at timestamp). Odoo verifies the signature, rejects replays, and enqueues a safe import. Without it, scheduled reconciliation keeps things in sync.
Is it safe to run against production data? Dry-run is ON by default, validation blocks risky writes, and rollback snapshots let you undo. You decide when to go live.
What support and refund policy do I get? Every request is answered within 24 hours, setup help included. If you report a bug within 2 months of purchase and it is not resolved within 15 days, you are entitled to a full money-back refund.
Data, privacy & limits
The connector reads products, customers, orders and order credit notes from your store and writes the corresponding Odoo records. Credentials are stored in admin-only fields.
In scope today: product/customer/order import, product export, order-state mapping, refund (order_slip) discovery, scheduled sync, signed webhooks.
Out of scope / best-effort: tax auto-matching (off by default, name-based, never auto-creates taxes); multi-warehouse stock routing; subscription/booking order types.
Support & updates
Support: support@bambooforge.dev — answered within 24 hours, setup help included.
Refund: report a bug within 2 months of purchase; if unresolved within 15 days, full refund.
Full source is included. Updates track the supported Odoo 20 / Shopware 6 Admin API line.
Upgrading & version compatibility
This build targets Odoo 20.0. Each Odoo major series (16.0, 17.0, 18.0, 19.0, 20.0) has its own dedicated build of this module — always install the build that matches your Odoo version. Mixing a build with a different Odoo series is not supported.
Patch upgrades (same series, e.g. 20.0.1.0.0 → later)
Back up your database and filestore first.
Replace the module folder with the newer build.
Restart Odoo with the module updated:
./odoo-bin -c your.conf -u bambooforge_shopware_connector -d your_db
Odoo applies any schema/data changes automatically. Your existing records and configuration are preserved.
Cross-version migration (moving to a newer Odoo)
Upgrading Odoo itself is a database migration handled by Odoo's standard upgrade tooling. When you migrate the database to the next Odoo series, install the matching build of this module for that series. Data created by this module carries over with the database migration.
After any upgrade the module's scheduled actions resume on their normal cadence — no manual re-activation is required.
Uninstallation
You can remove this module at any time from Apps → (this module) → Uninstall, or from the command line. Uninstalling is clean and reversible by reinstalling — but note what is and is not deleted.
What is removed
The module's own tables and every record in them (20 models, prefixed shopware.*) — this is the data this module created.
The menus, actions, views and reports this module installed.
Its scheduled actions (cron jobs) — they stop immediately on uninstall.
Connection records, credentials, field mappings, queue jobs and sync logs stored in Odoo.
What is preserved
Your remote platform is never touched. Uninstalling only removes the Odoo-side connector; products, customers and orders on the external store/service are untouched.
Records already imported into standard Odoo models (e.g. contacts, products, sales orders) remain — they are ordinary Odoo records once created.
Attachments and chatter messages on standard records are kept.
As always, take a database backup before uninstalling in production.
Changelog
20.0.1.2.4
Built for Odoo 20: record rules and access rights rewritten onto Odoo 20's single ir.access model, the screens rebuilt on Owl 3, and every icon moved to the icon set Odoo 20 ships.
20.0.1.0.0
Current release for Odoo 20.0. This build includes:
Odoo 20 <-> Shopware 6 connector over the Shopware Admin API (OAuth2 Integration): products, customers, orders and refunds.
JSON REST client, HMAC-signed webhook handling, two-way stock sync, live Sync Control Tower, resilient queue and dry-run safety.
Feature additions and fixes ship as new builds on the Odoo Apps store; this page and the module's version reflect the current published release. Always keep the build matched to your Odoo series (see Upgrading & version compatibility).
How we make sure it works
Before every release, 97 automated checks run against this app on Odoo 16, 17, 18, 19 and 20. Among them:
Nothing at all is an empty row not a crash.
A product shows its binding button only once bound.
Map refund to credit note.
Import to odoo true but dry run never moves stock.
The queue only calls mapper methods that exist.
Tested for real against Shopware 6.7: 16 products, 4 customers and 3 orders placed through the Store API arrived in Odoo at 91.96 each, 23 sync jobs, 0 errors.
The complete list is in the source you receive.